TOUR MY
Stairs & Hallway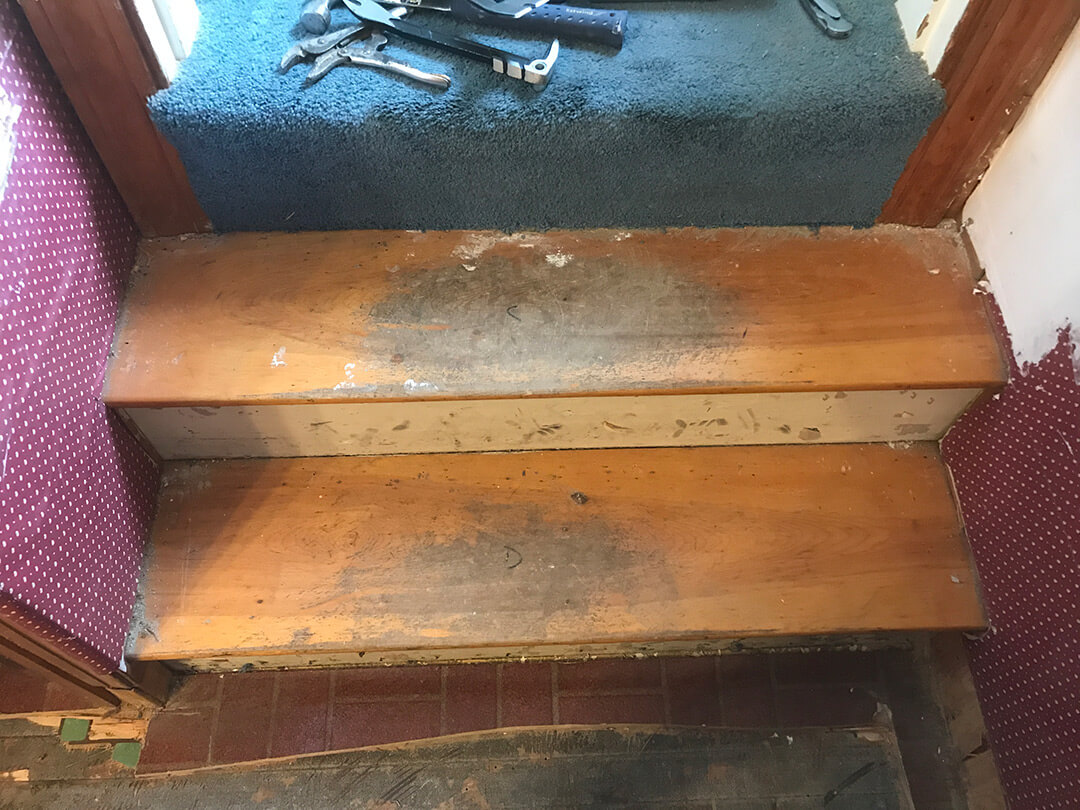
This area was dated, worn and ugly. But now, going up and down stairs is a pure pleasure!
We wallpapered and re-carpeted this area around 20 years ago, and it looked it. The carpet was stained and worn. And blue (what was I thinking?!) The wallpaper was actually still in good shape, just no longer my taste.
We removed the wallpaper and ditched the carpet. There was a lot more we had to do to this space but the results were amazing!
Summary information follows (just click on each of the boxes or keep scrolling if you are on mobile). Details about what we did and how we did it follow after that.
Topics covered here
PROJECT overview
JUST THE FACTS, MAM
![]()
This is one project where we chose to sub a lot of the work out. Here’s why:
- The walls in the stairwell were too tall to paint without scaffolding. I left that work to younger hands and feet.
- Refinishing the hardwood took a lot of equipment that we did not have nor did we want to invest in it.
We did pull up all the carpet ourselves and we prepped the hardwood. We also painted everything within reach – the upstairs hallway walls and all the trim. And we installed the light fixture. So we saved some money in those areas.
COST BREAKDOWN
Paint Supplies: $90
Lighting Fixture: $48
Closet Organizing Bins: $170
Wallpaper Removal Labor: $1200
*Floor refinishing: $724
TOTAL: $2232
Money doesn’t grow on trees. So how did we pay for this? Check out my post 6 Ways You Can Finance Your Renovation and I’ll fill you in!
Time to complete: 6 WEEKS
Nov ’17 Removed the wallpaper (painters), took up the carpet and removed brads and nails from the floor (us); painted the walls, trim & ceiling (painters & us).
Dec ’17 Refinished the hardwood floors (Northeast Flooring). Replaced the hallway light and the rest of the cleanup (us).
There’s always at least a few problems with this old house!
- Most of our walls are horsehair and we kind of dread working on them. We had to fix a couple of significant holes during the project and there is still one spot on the wall going up the stairs that will need to be repaired a little more at some point. For now, we’re all good.
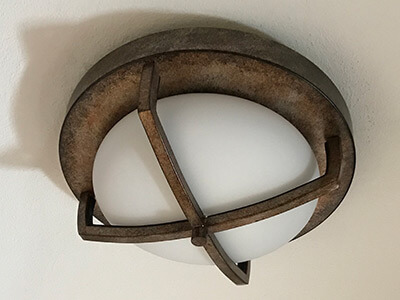
- The ceiling light fixture, simple as it is, was a nightmare for Dom to install. He had to rebuild the wiring and the box to fit the new light. An hour project turned into a multi-day project. But he got ‘er done!
For (non-affiliate) links to my purchases, see Shopping Link section below.
There were a few nice side benefits to improving this space
- The hallway is so much prettier now, it’s a genuine pleasure to walk up and down the stairs. It makes my heart happy.
- Hardwood is a lot easier to keep clean.
- We’ll probably never need to maintenance these floors again in our lifetime, aside from the occasional repair job.
- It’s an entirely different feeling for our feet getting up in the morning and walking down the hallway. You can glide, even slide, on hardwood LOL.
Something that we didn’t expect and that we are still getting used to is the less-muffled sound footsteps make on hardwood vs. carpet. There’s no doubt now when someone is walking up and down the stairs and hall. Good thing? 😉

Paint

Cost
This is one project where we chose to sub a lot of the work out. Here’s why:
- The walls in the stairwell were too tall to paint without scaffolding. I left that work to younger hands and feet.
- Refinishing the hardwood took a lot of equipment that we did not have nor did we want to invest in it.
We did pull up all the carpet ourselves and we prepped the hardwood. We also painted everything within reach – the upstairs hallway walls and all the trim. And we installed the light fixture. So we saved some money in those areas.
COST BREAKDOWN
Paint Supplies: $90
Lighting Fixture: $48
Closet Organizing Bins: $170
Wallpaper Removal Labor: $1200
*Floor refinishing: $724
TOTAL: $2232
Money doesn’t grow on trees. So how did we pay for this? Check out my post 6 Ways You Can Finance Your Renovation and I’ll fill you in!

Timing
Time to complete: 6 WEEKS
Nov ’17 Removed the wallpaper (painters), took up the carpet and removed brads and nails from the floor (us); painted the walls, trim & ceiling (painters & us).
Dec ’17 Refinished the hardwood floors (Northeast Flooring). Replaced the hallway light and the rest of the cleanup (us).

Problems
There’s always at least a few problems with this old house!
- Most of our walls are horsehair and we kind of dread working on them. We had to fix a couple of significant holes during the project and there is still one spot on the wall going up the stairs that will need to be repaired a little more at some point. For now, we’re all good.
- The ceiling light fixture, simple as it is, was a nightmare for Dom to install. He had to rebuild the wiring and the box to fit the new light. An hour project turned into a multi-day project. But he got ‘er done!

Shopping
For (non-affiliate) links to my purchases, see Shopping Link section below.

Improvements
There were a few nice side benefits to improving this space
- The hallway is so much prettier now, it’s a genuine pleasure to walk up and down the stairs. It makes my heart happy.
- Hardwood is a lot easier to keep clean.
- We’ll probably never need to maintenance these floors again in our lifetime, aside from the occasional repair job.
- It’s an entirely different feeling for our feet getting up in the morning and walking down the hallway. You can glide, even slide, on hardwood LOL.
Something that we didn’t expect and that we are still getting used to is the less-muffled sound footsteps make on hardwood vs. carpet. There’s no doubt now when someone is walking up and down the stairs and hall. Good thing? 😉
![]()
before & AFTERS
What a remarkable difference!
The first three pictures are from the hallway or stairwell. The last is from one of the two bedrooms that we refinished at the same time as the stair area.
![]()
all the DETAILS
WHAT WE DID AND HOW WE DID IT
The walls in our old house are horsehair and we never know what we’ll get once we start mucking with them. To complicate things, the walls in this area were wallpapered, and we wanted to convert them to paint.
We already had experience with removing wallpaper completely in our guest bedroom and it wasn’t a fun experience. We decided after that room that we would try to paint over wallpaper in the other rooms. This would hopefully save us a lot of time and effort in wall repair.
The challenge was that the wallpaper here had a raised pattern, so we decided to remove just the very top layer and then paint over the rest. The top layer of most wallpaper will pretty much peel right off the wall if you tug on it. We helped things along a bit by soaking the walls where we needed to.
For more information on how to remove wallpaper completely from your walls, click here. For the details about how we painted over the wallpaper in this and another room, click here.
Once the wallpaper had been removed, and the walls repaired and primed, they were ready for paint.
The painters did the heavy lifting on this one. They painted the hard-to-get-to spots, like the stairwell, which required scaffolding. We painted the upstairs hallway, all the trim and backboards on the stairs. Two coats of Behr Premium Ultra on both the walls and trim. White paint on the ceiling. Paint colors are listed towards the top of the page.
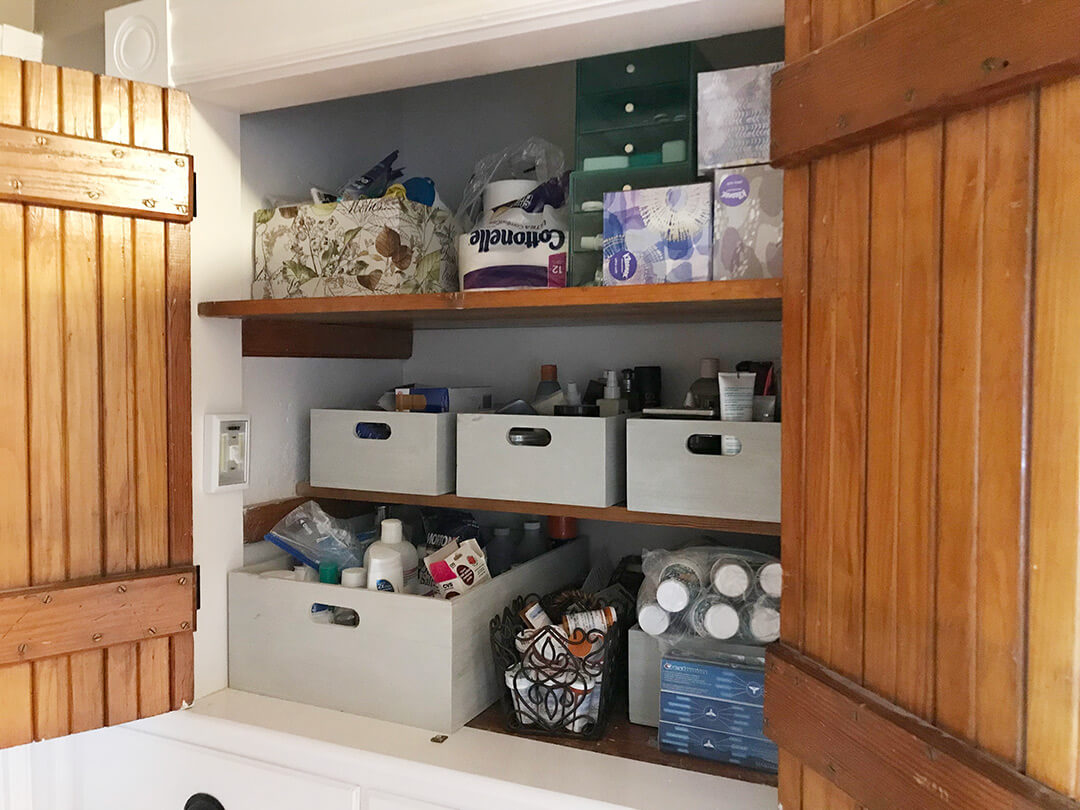
One of the wonders of many old houses is the built-ins. You just don’t find these in newer homes. We have a built-in cabinet and drawers in the hallway upstairs but it was a bit of a disaster. Once I painted it, I took the opportunity to organize it and made it an attractive and functional space. We can store and find bathroom supplies now! Yippee!
If you’re interested in how to organize anything, by the way, I have an awesome guide (shameless plug) that will help! It outlines how I organize everything now. Download it for FREE here.
A picture of the finished cabinet ![]() is below.
is below.
The floors were carpeted and it was time to either re-carpet or refinish the wood floors underneath. We checked and the floors looked in decent shape so we got the refinishing scheduled, pulled up the carpet, and prepped the floors.
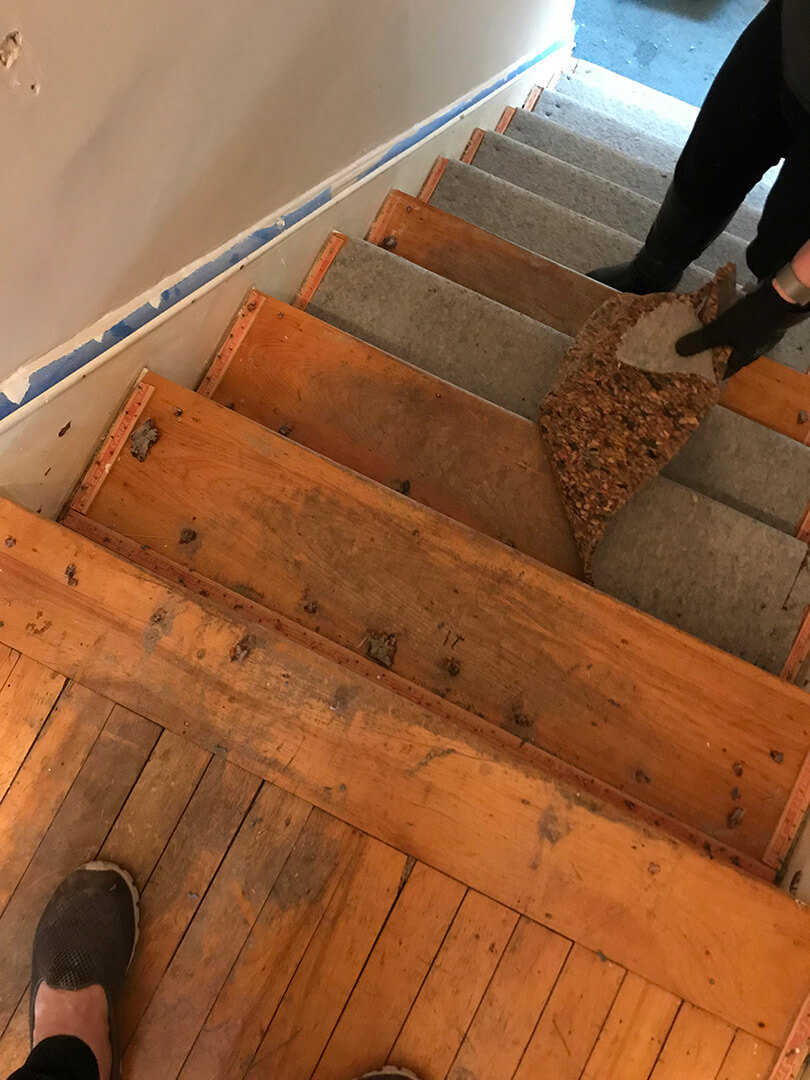
Stairs, during carpet removal

Carpet Removal
Shortly after we finished the painting in this area, my sister was visiting and, with nothing better to do that day we decided to rip up the carpet in the hall and stairwell.
We pulled up the carpet and then removed the tack strips and the hundreds (it may have been thousands) of brads and nails that were left behind.
The good news is that we confirmed what we suspected, that the entire floor was in decent enough shape that we knew it would respond well to re-finishing.

Floor Refinishing
Floor refinishing is a project that we hired out. Click here to read my post on our floor refinishing projects. There’s lots of information about how we selected a vendor and the entire process.
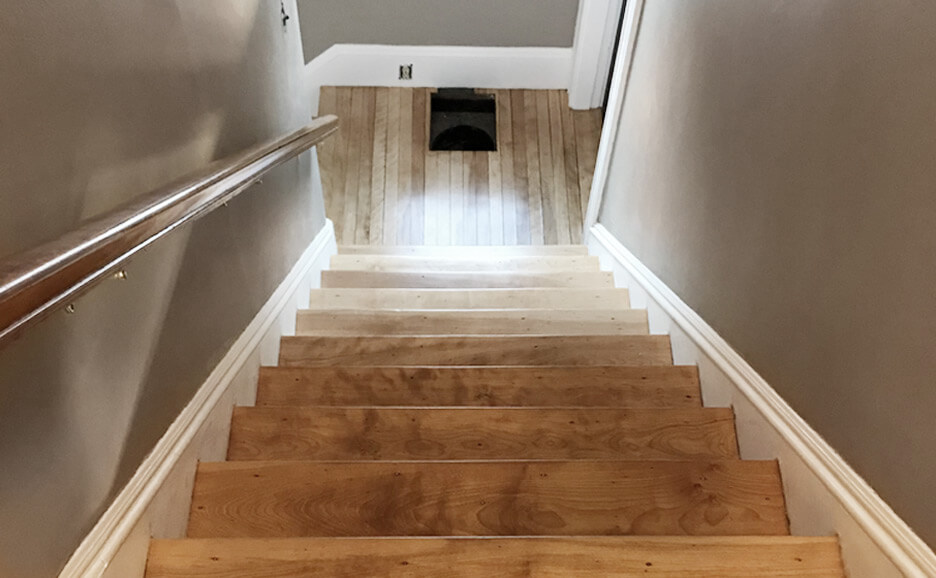
We were thrilled with how the stairs and hall came out. The wood there is red oak, with narrow slats, very similar to the floors in the dining and living rooms. For ‘after’ pics, see below…
There were a number of things left to do to finish off the space:
- Hung the new light fixture
- Re-installed the smoke detector (important!)
- Re-touched up the paint wherever necessary (especially the stair backboards which took a bit of a beating during the refinishing)
- Reinstalled the handrail (yay for safety!)
- Installed new vintage light switches (buttons, actually) and face plates which I absolutely love
- Painted the floor grates
I was originally going to add a runner or treads on the stairs but in the end we decided to leave the stairs bare, given there’s not a lot of traffic on them between just the two of us.
That brought this project to a close. It took some time and more money than we usually spend on a project this size but the end result was so worth it. See more pics below.
Time for a small celebration and then it’s on to the next room!
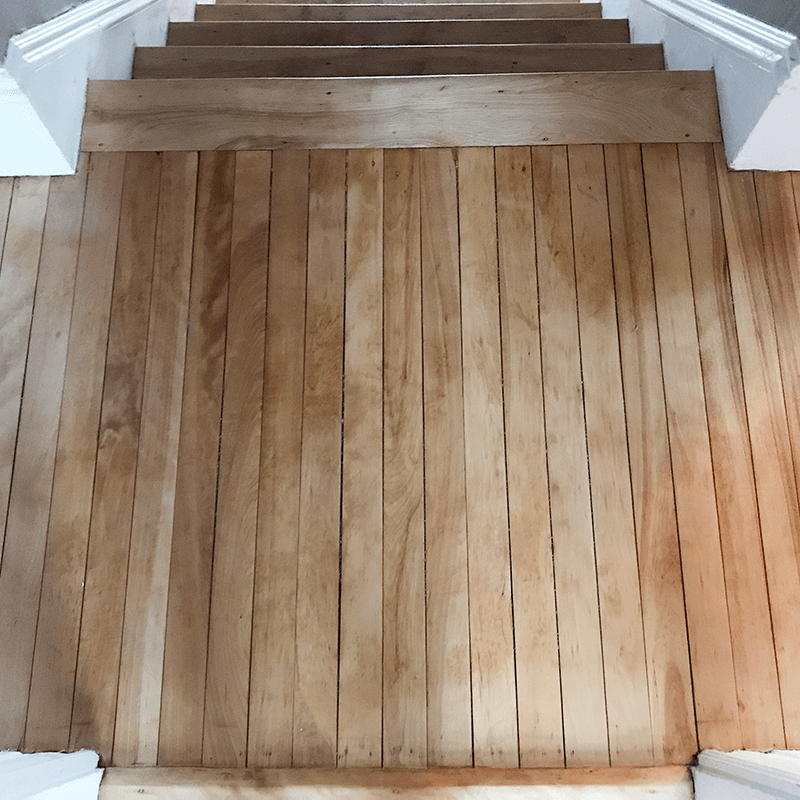
Top of the stairs, refinished
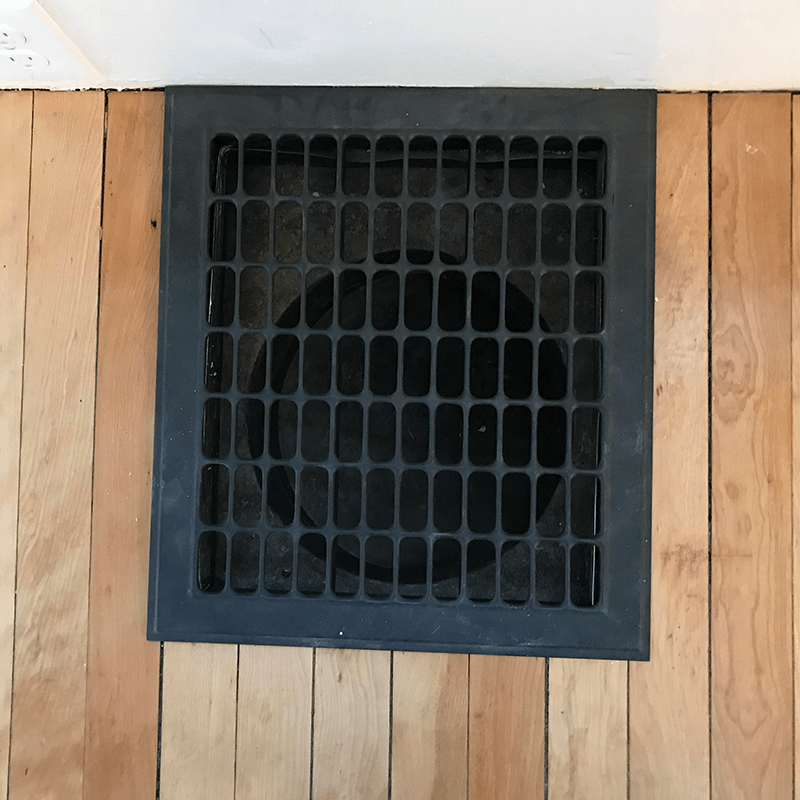
Painted floor grates
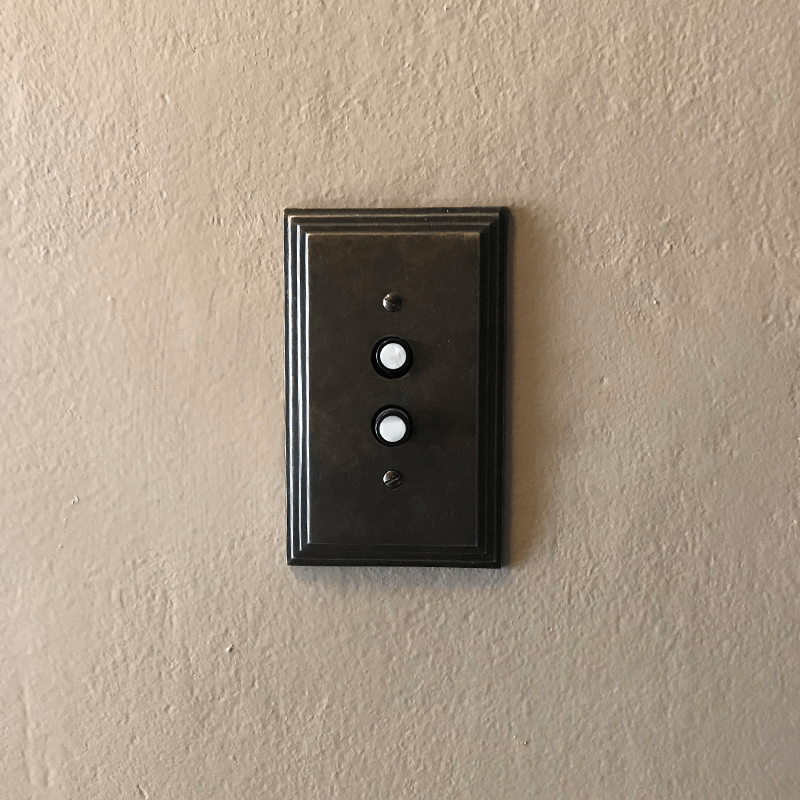
New vintage light buttons
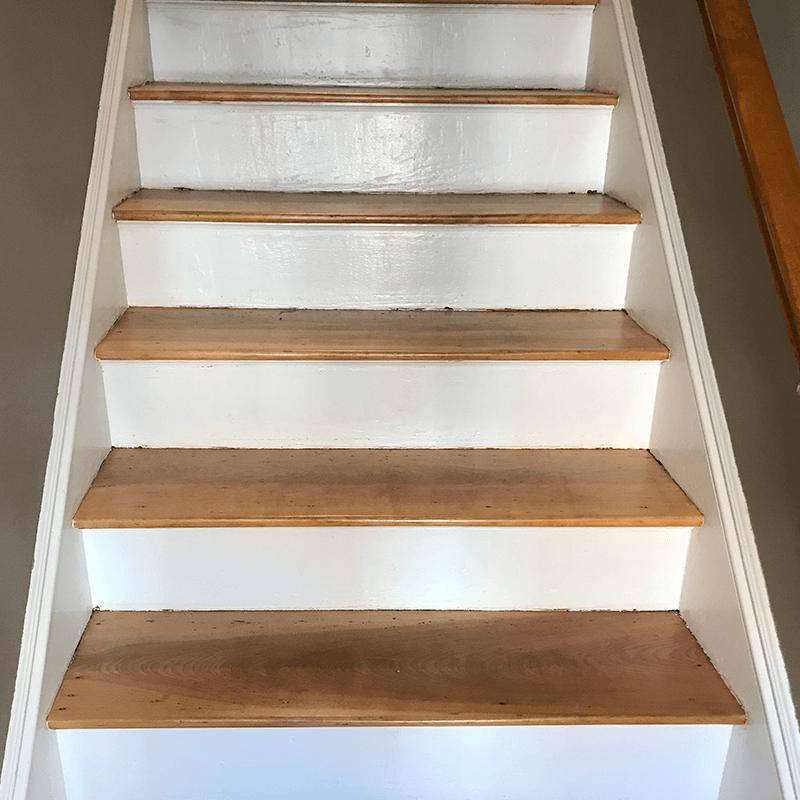
Refinished stairs, view from bottom
SHOPPING (and other) links
Some of my favorite parts of the room follow, with (non-affiliate) shopping links. Click or tap on the image to navigate to the link.

How about you?
Do you have a favorite area or room in your house that you’ve renovated? I’d love to hear about it. Please share in the comments below!
Enjoyed reading the article above, actually explains everything in detail,
the article is very interesting and effective.
Thank you and good luck in the articles.
King regards,
Thomassen Henneberg
Thank you so much!