
How to Install & Use Your FREE Lightroom Preset
One-touch Photo Editing
In this post, I include a FREE Lightroom preset and the instructions to use and install it on your mobile device.
Adobe Lightroom
Adobe Lightroom is my mobile photo editing app of choice, and I’ve tried a LOT of them. Many are good, some very good. But, there are a few great features about Lightroom that make it really stand out as a fabulous mobile app.
- It’s a FREE download for both iOS and Android (keep reading for download links)
- The app includes everything you’ll need to edit your photos
- You also get the ability to create, install and use presets
The following are the download links for Lightroom mobile, in case you don’t already have it installed.
If you’re interested in the desktop version, there is a cost, you’ll need a subscription to Adobe. Click here for more information about Adobe Creative Cloud subscription options for Lightroom desktop.
What’s a Lightroom Preset?
One fabulous way to get a quick, easy and consistent look to your photos is with a Lightroom preset, and in this post I’ve provided you with a FREE Lightroom preset, even better!
A preset is a set of adjustments that you can apply to any photo with a single click. So, instead of applying every individual adjustment over and over to every file, you only need to use the preset, and it will do all the work for you. You get the same results every time, effortlessly.
My FREE Lightroom Preset, Still Life
I’ve included 2 presets in this post. Both of them brighten an otherwise dull image, without changing or sacrificing the image colors or adding unnecessary contrast. The presets can be used on any picture, but I use them mostly on still lifes, hence the name.
One of the presets adds vignetting to the image, meaning that it darkens the outer edges. This can be a very artsy addition to some photos. But not always, so I’ve added a preset which is identical but without the vignetting.
View the sample images below.


 With the ‘Still Life Edges’ Preset
Preset Downloads
For a limited time, the presets I share here are absolutely FREE Lightroom presets. You don’t even need to join my email list (though that will change in the near future).
Here are the links:
How to Install and Use a Preset
First, a disclaimer. I have an iPhone and don’t have access to an Android mobile device so the instructions I include here are iPhone instructions.
I’m including two types of tutorials because I know that we all learn differently.
- One is a video where I walk you through the
screenflow - The other is a step-by-step instructional, where you can follow along at your own pace with the text and images I provide.
Video Tutorial
The video tutorial below is a little 3 minutes, 45 seconds long. If you’re having a problem viewing it here, click here for a link to the YouTube version. When I originally created the presets, I simply called them ‘Nest’ so in this video you will hear me referring to them by that name.
Step-by-Step Instructions
Below is the text version of the tutorial, in case you prefer to follow at your own pace.
1. If you have not already, download the mobile Lightroom app.
2. Download your preset(s), and yes, you can download both of them if you like
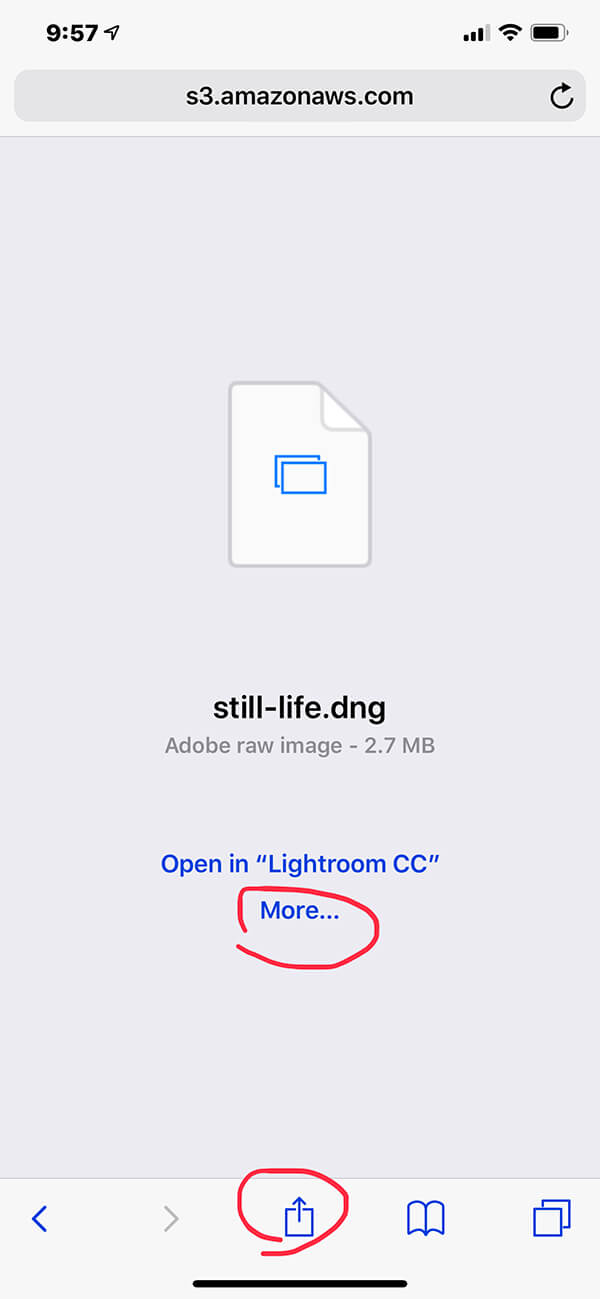
3. You’ll be asked to Open in “one of your apps” followed by More… Tap on the word More or tap on the upload icon at the bottom middle of your screen.
4. Launch the Lightroom mobile app.
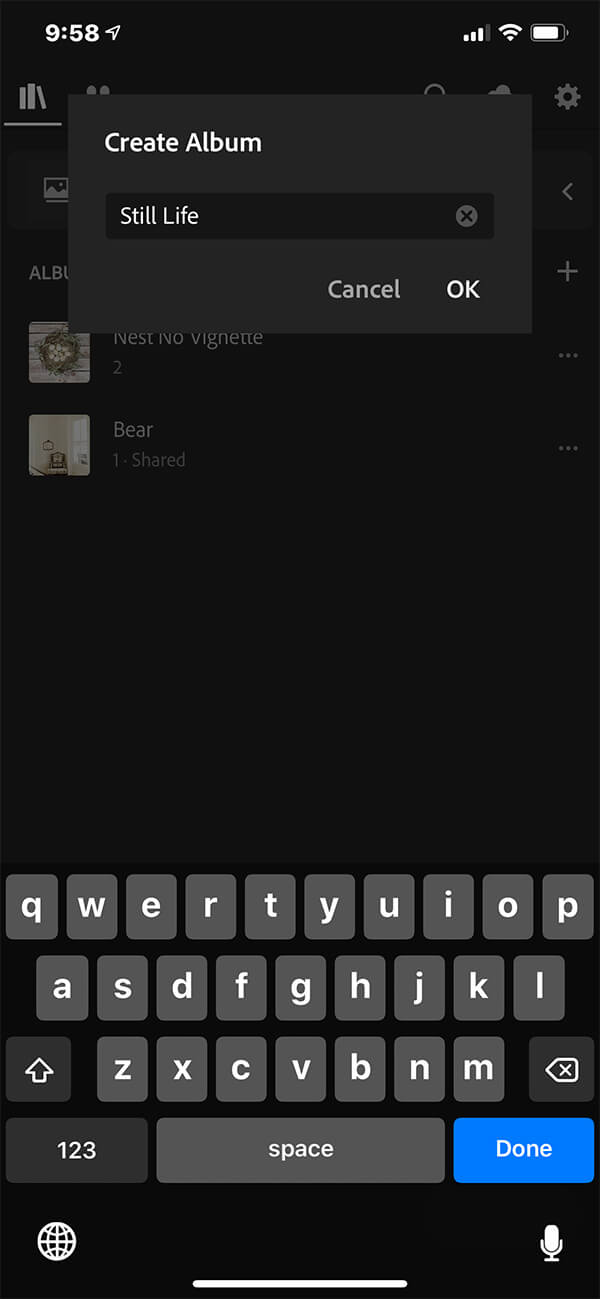
5. Create a new album. We’ll call it Still Life.
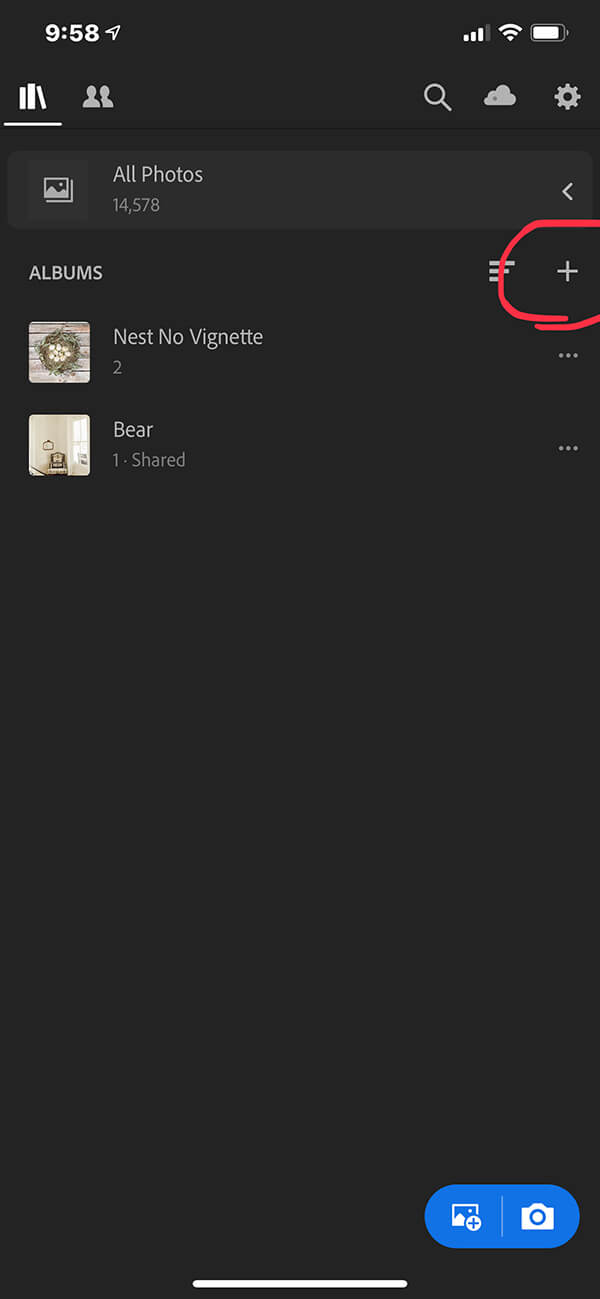
To do this, navigate to the page in Lightroom that you see below. You may need to click a few times on the < at the top left of your screen until you see this page. To the right of the
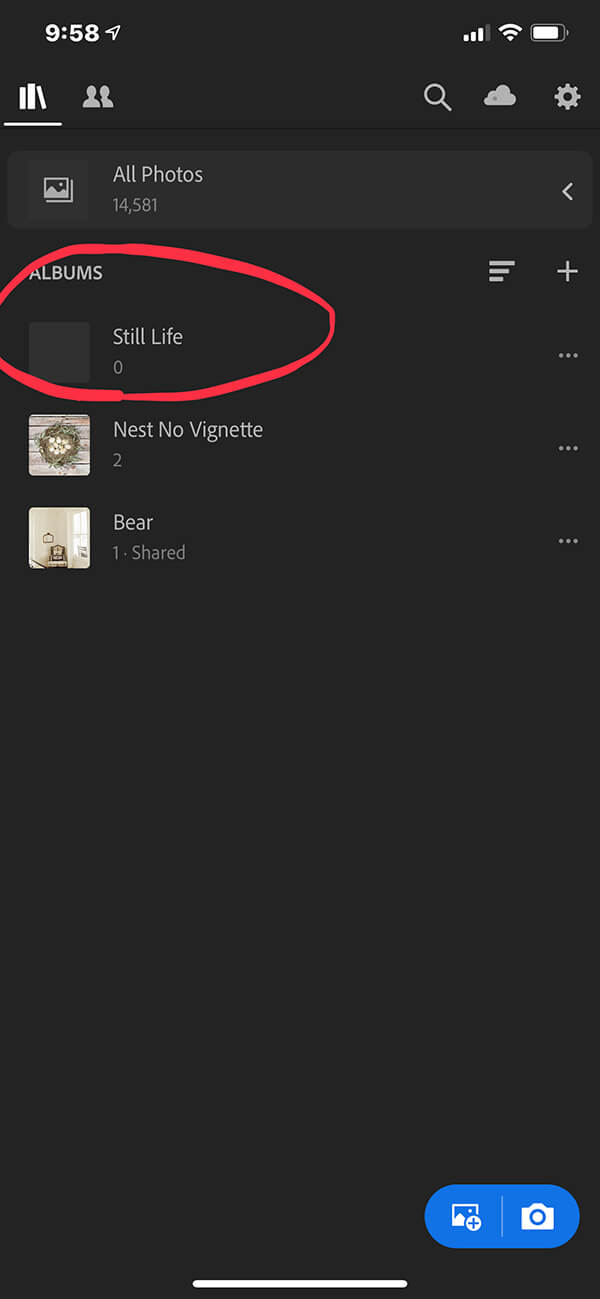
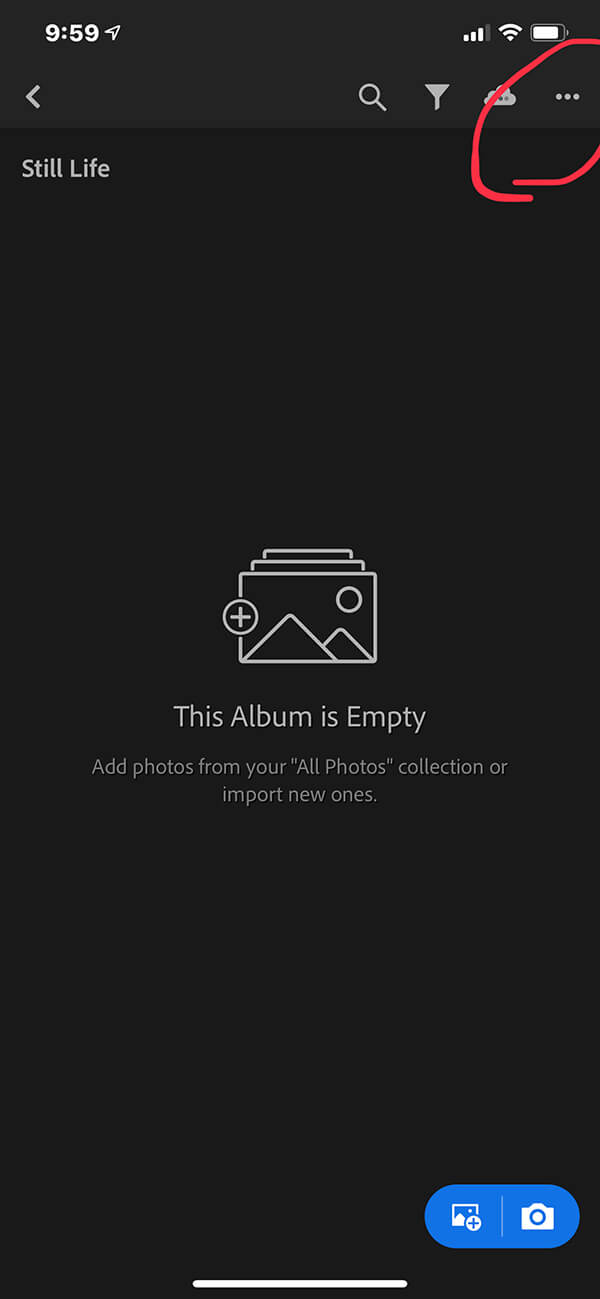
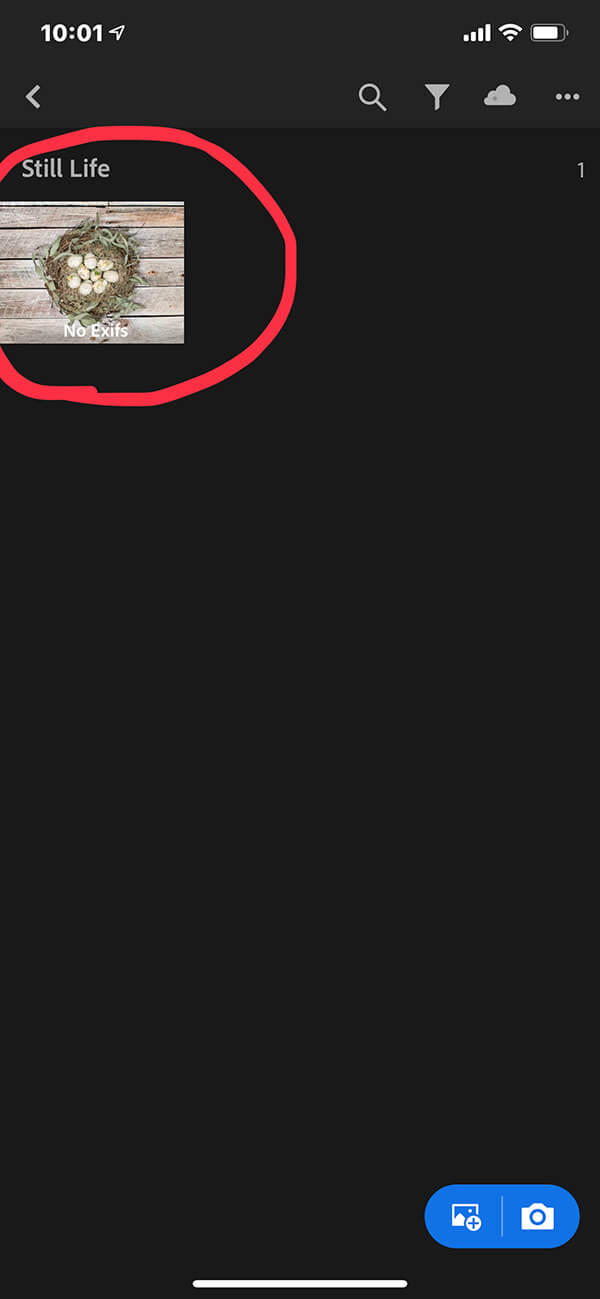
6. Tap on the Still Life Album (first screenshot below).
7. It will tell you that the album is empty (second screenshot). Tap on the top 3 dots on the top right of your screen.
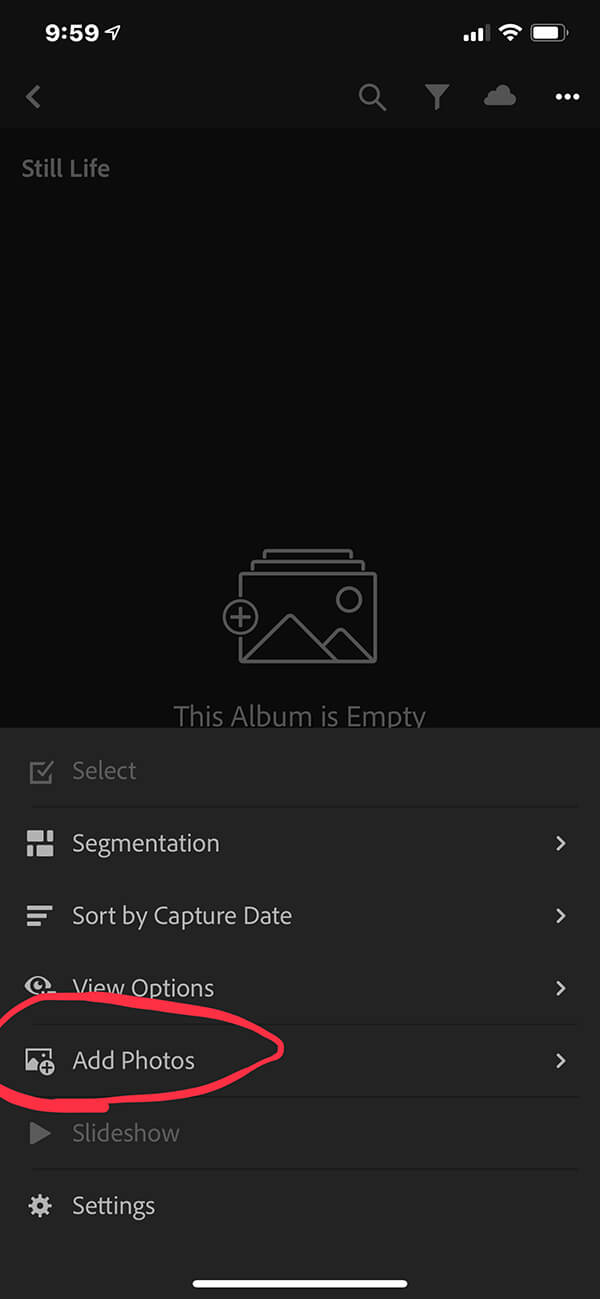
8. You’ll be presented with a small drop down box at the bottom of your screen (third screenshot). Tap on Add Photos
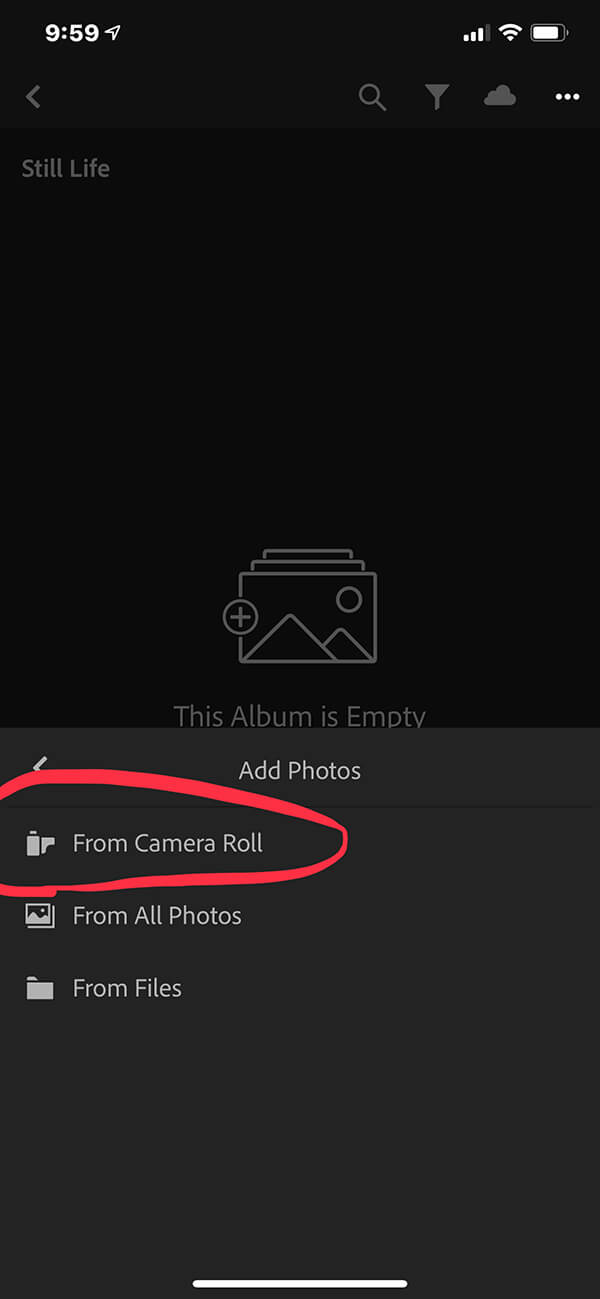
9. You’ll be presented with another drop down box (fourth screenshot). Tap on From Camera Roll.
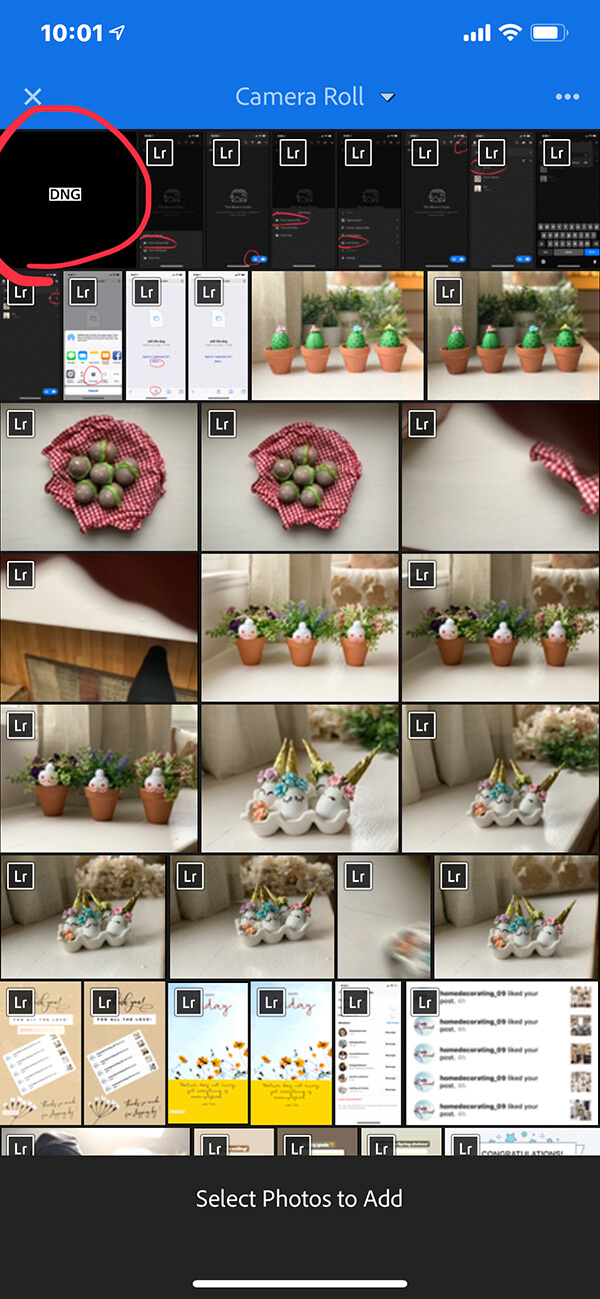
10. Select the file you downloaded. It will be a black square with the letters DNG in the center (first screenshot below).
11. Tap on the blue button on the bottom of your screen ‘Add 1 photo’ (second screenshot)
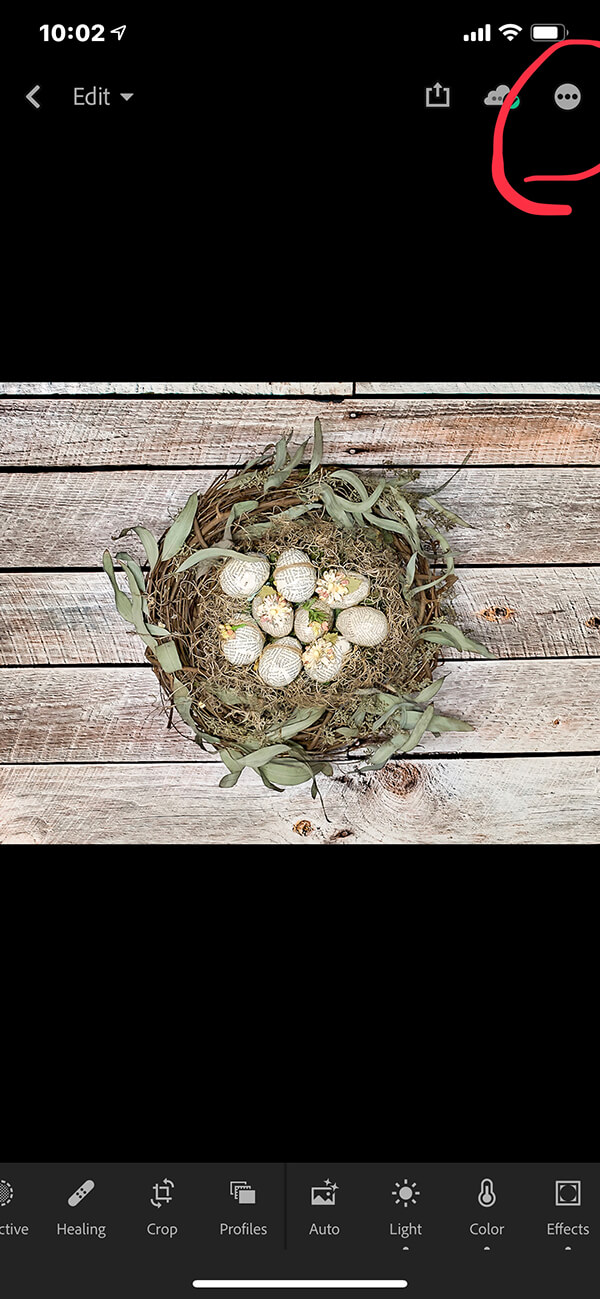
12. You’ll see my picture of a nest of eggs appear in the top left of your screen. Tap on that image (third screenshot)
13. The image will enlarge. Tap on the three dots in the gray circle on the top right of your screen (fourth screenshot).

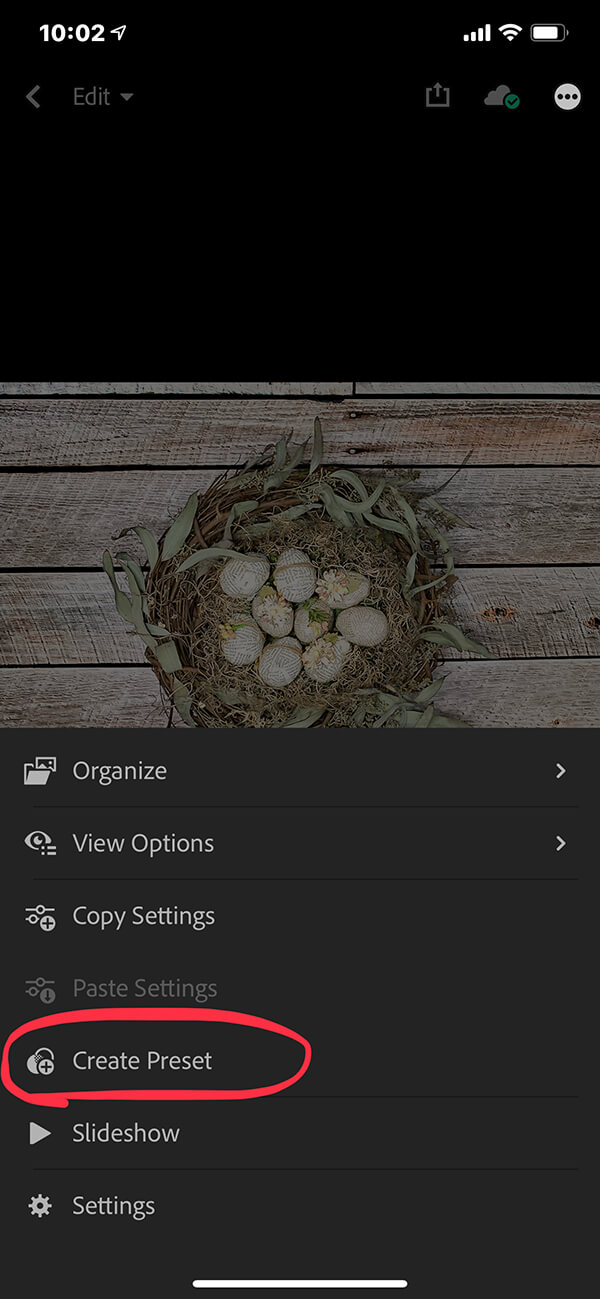
14. Select Create Preset (first screenshot below).
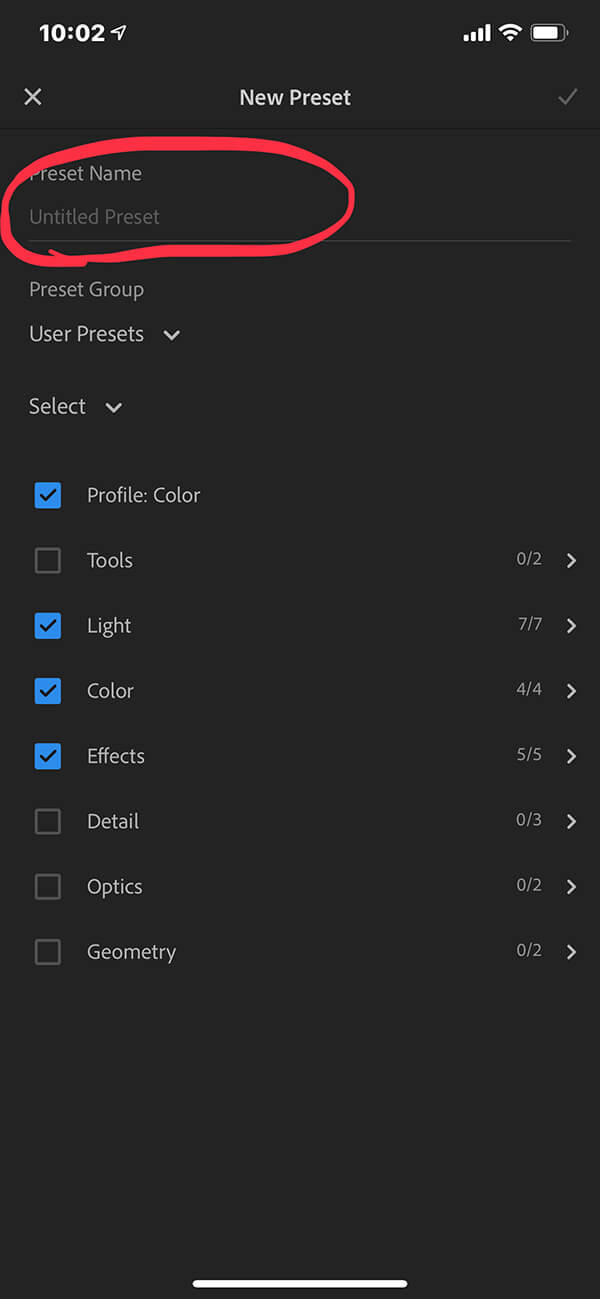
15. Give the preset a name (I’ll call it Still Life) and for purposes of simplicity, leave everything checked that is already checked. Then tap on the checkmark on the top right of your screen. (second screenshot). You’ll see a notice that the preset ‘Still Life’ has been added.
You’re done!
Congrats, you’ve added your first Lightroom preset.
If you like, go back and follow the instructions to add the second preset. You can then use
How to Use the Still Life Preset
Now that you have Your Lightroom preset installed, here are some
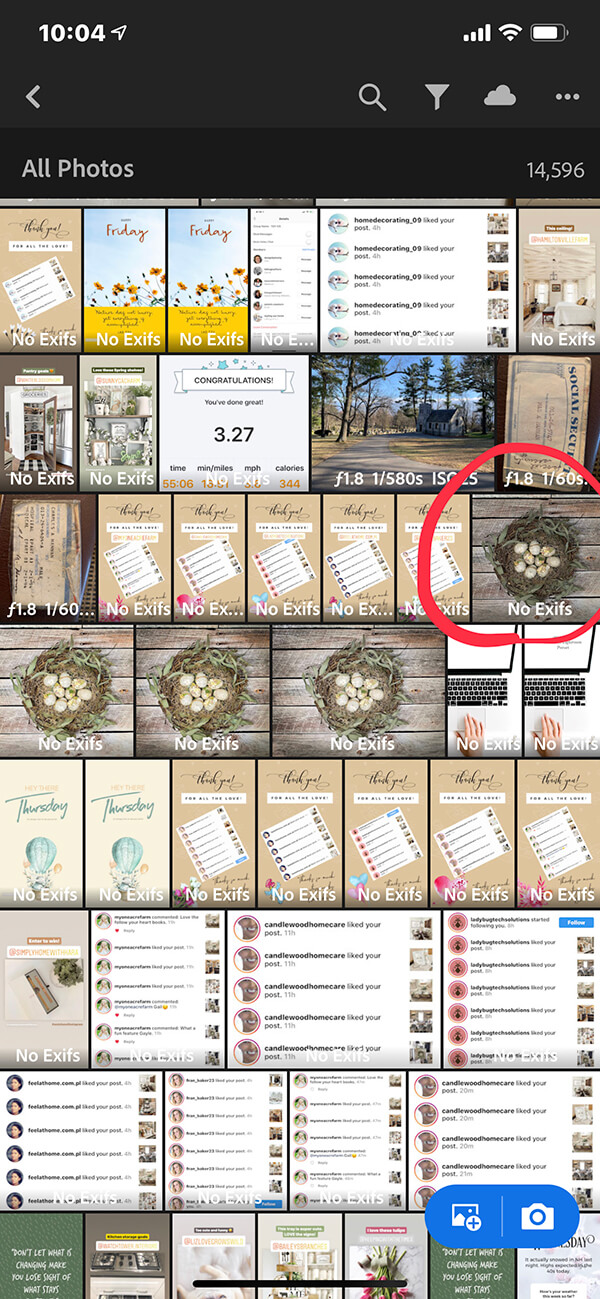
1. In Lightroom, click on All Photos if necessary to display your camera roll. Then tap on any photo to open it in Lightroom (first screenshot below).
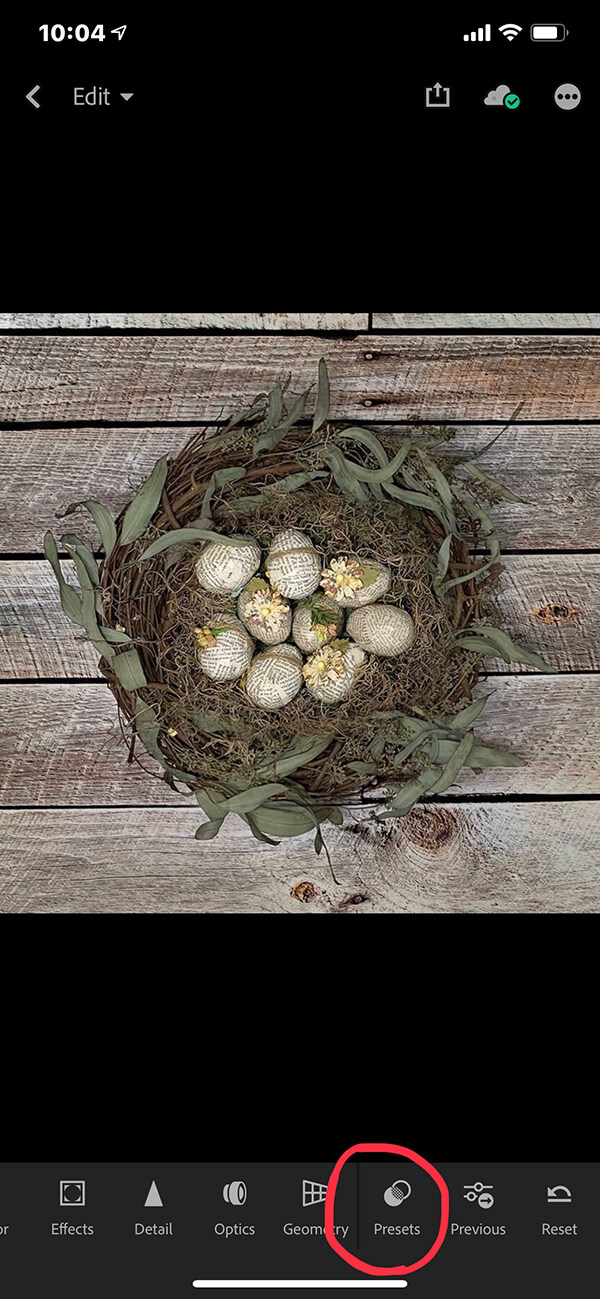
2. Scroll the bottom icons to the right until you locate the Presets icon. Tap on it (second screenshot).
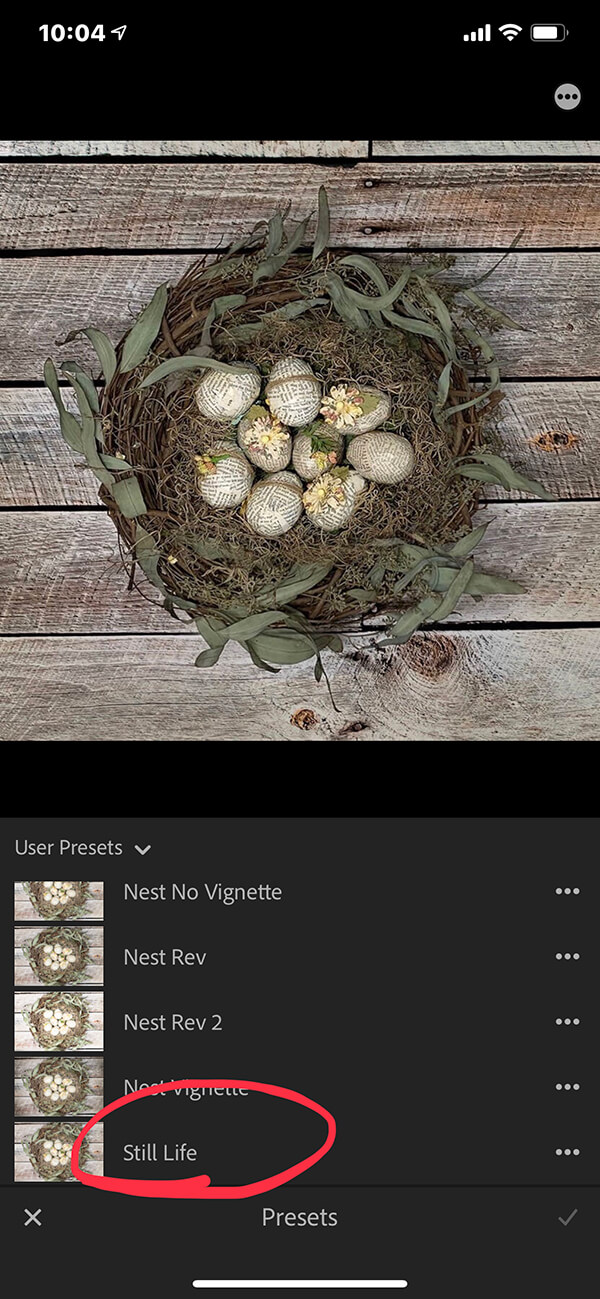
3. You’ll see the Still Life preset listed. Tap on it and all the selections for the preset will be applied at once (third screenshot).
4. Tap on the checkmark on the bottom right of your screen to set the preset

How to Edit the Settings
What the preset has done is
For instance, if you would like to make the photo a little less bright, you would:
1. Navigate to the Light Category and tap on it.
2. Move the Exposure slider to the left. You’ll see the picture get a little darker as you move. When the picture is where you want it to be, stop moving the slider.
You can make similar adjustments to any setting within any category.
How to Save Your Image
Once you have made all the changes you wish to make to an image, be sure to save it. The best way to do this is to save it to your camera roll. Here’s how to do this.
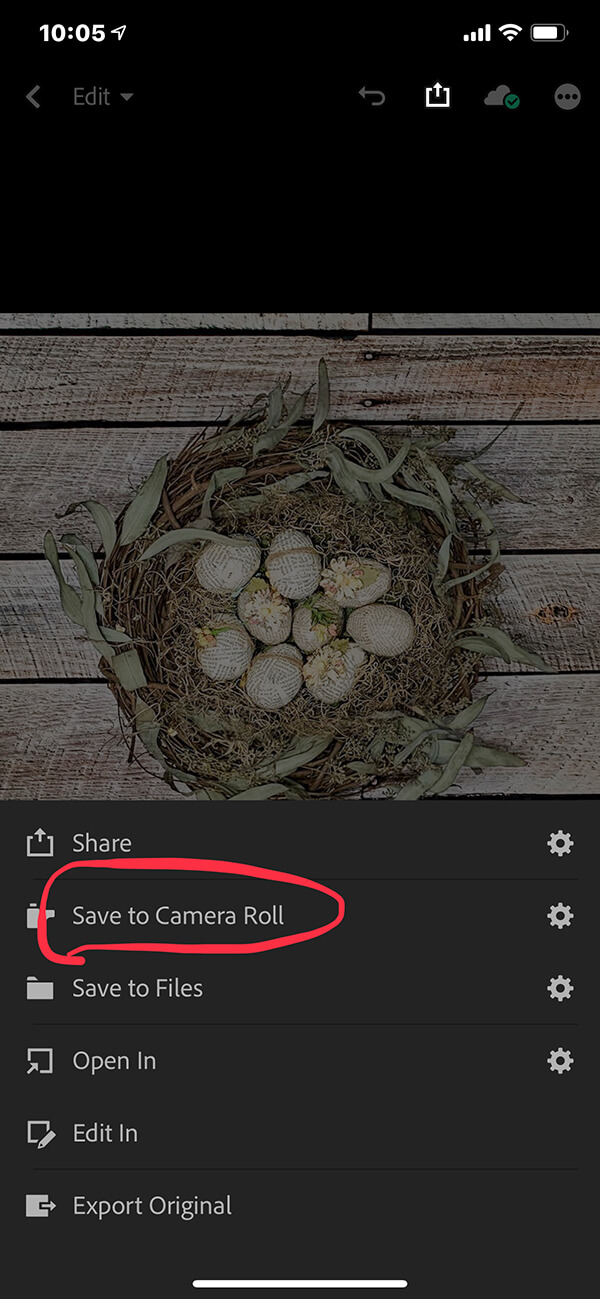
1. Tap on the upload icon on the top right of your screen (see first screenshot below).
2. You’ll be presented with a small drop-down box on the bottom of your screen. Tap on Save to Camera Roll (second screenshot).
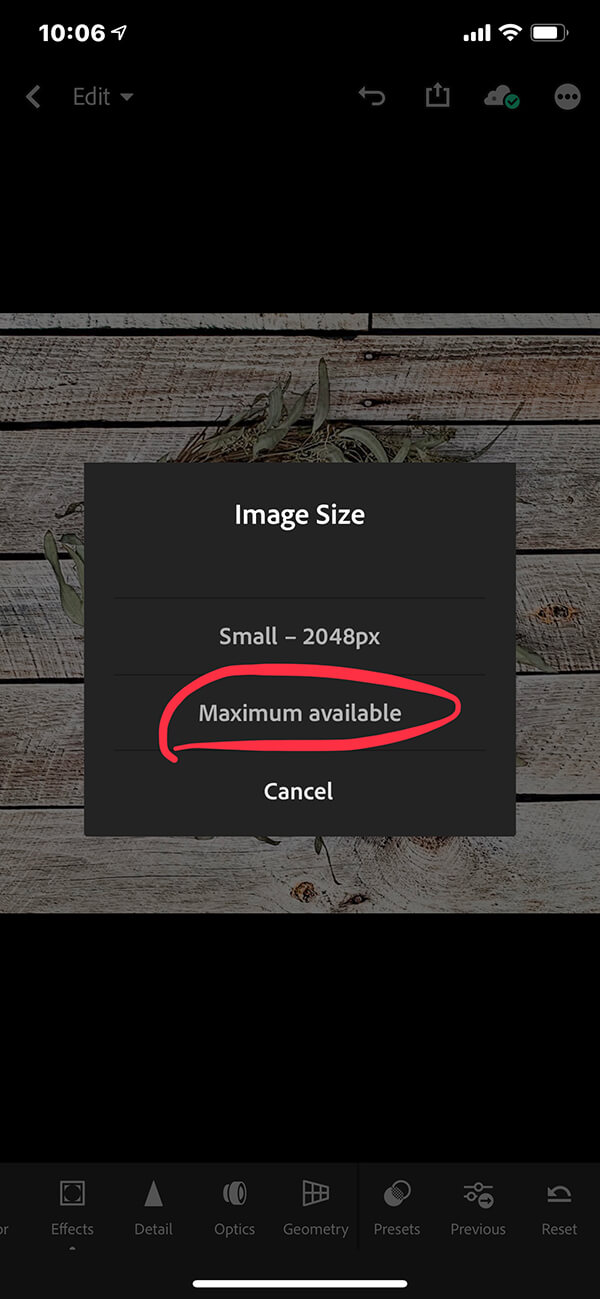
3. You’ll be presented with image size options. If you want to keep the size of your images smaller, select a smaller size. Otherwise, select Maximum available (third screenshot).
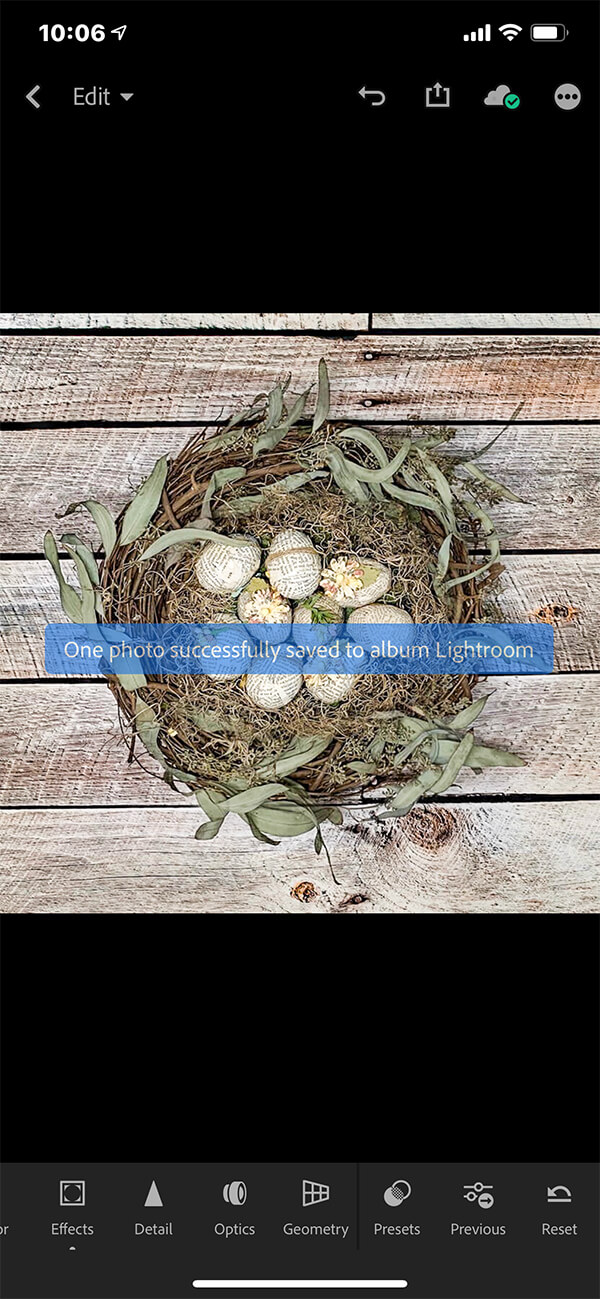
4. You’ll see a notice (fourth screenshot) that your photo has been saved successfully.
5. You can then go to your camera roll and you’ll see your image there. It’s now available for you to upload to social media, your blog or any other photo editing app.

How about you?
Do you have a favorite preset? If you use mine I’d love to hear about it! Please share in the comments below.