TOUR MY
Dressing Room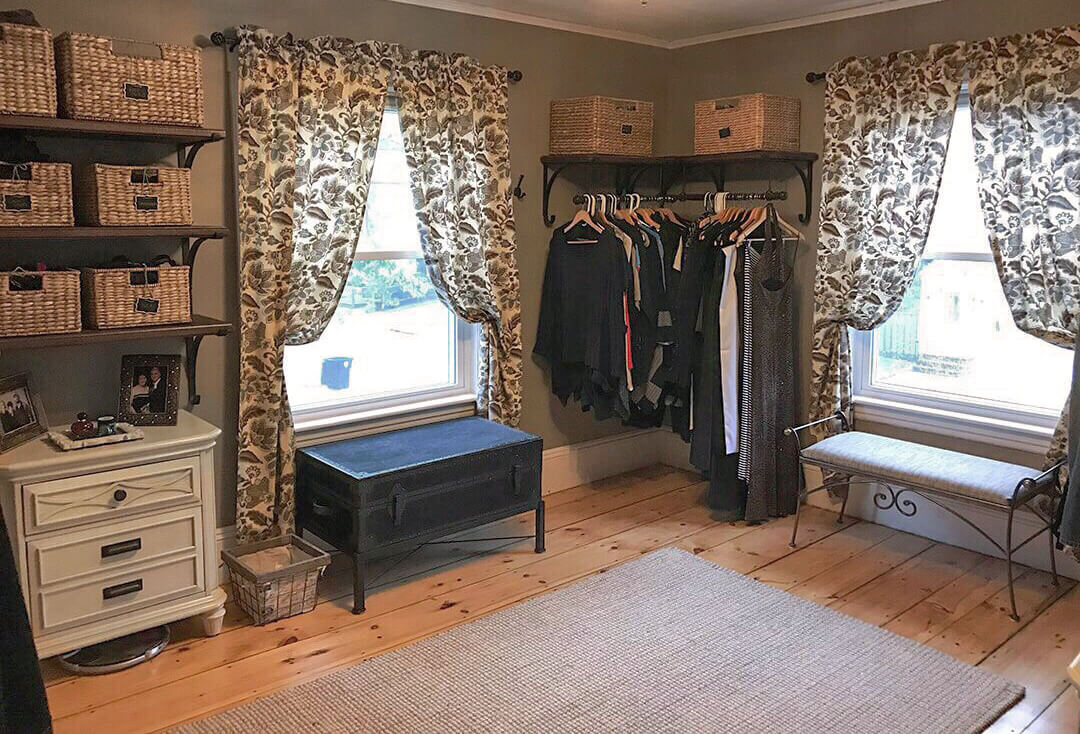
The Most Practical, Beautiful Dressing Room I’ve Ever Seen.
Somewhere around 1992 we built ‘temporary’ clothing racks in a spare bedroom because, well Victorians just didn’t believe in closet space. The tiny closet in my bedroom holds around 5 sweaters, max. There those temporary racks stayed until 2017, when we transformed that room into the most practical, beautiful dressing room I could imagine. There’s room for everything and organization galore. I can put my finger on anything I want at a moment’s notice. And did I mention it’s beautiful? Keep reading for what we did…
Topics covered here
Overview
Before & Afters
All the Details
Room Views
Features I Love
Shopping Links (separate page)
PROJECT overview
JUST THE FACTS, MAM
![]()

The racks were clearly the focus of this room, and the largest expense. Regarding the work, we did all of it ourselves, except refinishing the hardwood floors.
COST BREAKDOWN
Decor: $36
Wall Art: $0
Floor refinishing: $515
Furniture (includes the racks): $2,717
Organization (baskets +): $922
Lighting: $161
Paint Supplies: $35
Window treatments: $148
TOTAL: $4,534
Money doesn’t grow on trees. So how did we pay for this? Check out my post 6 Ways You Can Finance Your Renovation and I’ll fill you in!
Time to complete: approximately 2 months
I actually purchased a lot of the racks in September of 2016, but it took until May 2017 before we were ready to start working on this room.
May, 2017 We moved the temporary racks to another spare room. We then painted the walls and trim just in time for Northeast flooring to complete the floor refinishing in that room.
June, 2017 Once the floor was cleared to walk on, we wet up the new room. We installed the new racks then moved the clothes from the old racks in the spare bedroom. A few finishing touches and we were good to go.
Problems and Challenges
- There was a lot of waiting in between getting things done in this room. It was 9 months from the time I ordered our new clothes racks until the room was done.
- It was a challenge to design this room, and to figure out exactly how many racks we would need. In the end we did have to make a few minor adjustments but nothing earth-shattering.
- I didn’t realize that we would need some drawer and table-top space when I was planning this room. Luckily there was enough room to add a couple of nightstands, one on each side of the room, and that worked out beautifully.
- Amazingly, the racks installed on the walls fairly easily which was shocking given all the issues we generally have with our walls. Good thing, because the racks, with the clothes on them, are incredibly heavy!
For shopping links, click here (separate page)
How this room improves our lives
- The one thing we all do without fail every single day is pick out clothes to wear for the day. In our old dressing room, this was never something to look forward to, but today it a pleasure. There’s lots of space, there aren’t clothes that we never wear taking up space and whatever we’re looking for is always close at hand.
- When laundry is done, putting clothes away is a breeze because there’s a place for everything.
- Even though we gave away 3/4 of our clothes when we updated this room, it’s so much easier to find things that we both feel like our wardrobe expanded.
- It’s such a pretty room that I love walking into it. What a great way to start the day.

Paint

Cost
The racks were clearly the focus of this room, and the largest expense. Regarding the work, we did all of it ourselves, except refinishing the hardwood floors.
COST BREAKDOWN
Decor: $36
Wall Art: $0
Floor refinishing: $515
Furniture (includes the racks): $2,717
Organization (baskets +): $922
Lighting: $161
Paint Supplies: $35
Window treatments: $148
TOTAL: $4,534
Money doesn’t grow on trees. So how did we pay for this? Check out my post 6 Ways You Can Finance Your Renovation and I’ll fill you in!

Timing
Time to complete: approximately 2 months
I actually purchased a lot of the racks in September of 2016, but it took until May 2017 before we were ready to start working on this room.
May, 2017 We moved the temporary racks to another spare room. We then painted the walls and trim just in time for Northeast flooring to complete the floor refinishing in that room.
June, 2017 Once the floor was cleared to walk on, we wet up the new room. We installed the new racks then moved the clothes from the old racks in the spare bedroom. A few finishing touches and we were good to go.

Problems
Problems and Challenges
- There was a lot of waiting in between getting things done in this room. It was 9 months from the time I ordered our new clothes racks until the room was done.
- It was a challenge to design this room, and to figure out exactly how many racks we would need. In the end we did have to make a few minor adjustments but nothing earth-shattering.
- I didn’t realize that we would need some drawer and table-top space when I was planning this room. Luckily there was enough room to add a couple of nightstands, one on each side of the room, and that worked out beautifully.
- Amazingly, the racks installed on the walls fairly easily which was shocking given all the issues we generally have with our walls. Good thing, because the racks, with the clothes on them, are incredibly heavy!


Improvements
How this room improves our lives
- The one thing we all do without fail every single day is pick out clothes to wear for the day. In our old dressing room, this was never something to look forward to, but today it a pleasure. There’s lots of space, there aren’t clothes that we never wear taking up space and whatever we’re looking for is always close at hand.
- When laundry is done, putting clothes away is a breeze because there’s a place for everything.
- Even though we gave away 3/4 of our clothes when we updated this room, it’s so much easier to find things that we both feel like our wardrobe expanded.
- It’s such a pretty room that I love walking into it. What a great way to start the day.
![]()
before & AFTERS
What a remarkable difference!
![]()
all the DETAILS
WHAT WE DID AND HOW WE DID IT
We had to get everything out of the room in order to start working on it. But first, we had to clean out a spare room, where we planned to move the existing racks temporarily.
Before moving the clothes, we took a first pass at weeding through them (BIG contribution to Goodwill). We then moved the racks and the remaining clothes to their temporary location.
That took care of most of what was in the room, except a few odds and ends which we pretty much dumped.
Painting the trim and walls was pretty straight forward. Paint colors are listed towards the top of the page.
We also had the floor refinished as part of our overall floor refinishing project. We timed the work on this room so it would coincide with the floor refinishing.
Once the refinished floor was ready to walk on, we installed the new clothing racks according to the layout that I created. We did have to add a couple of additional corner pieces to fit everything together properly.
We weeded through our clothes one more time before moving them into this room (another Goodwill contribution!).
We then dismantled and trashed the old racks, freeing up the spare room to be worked on. Yay!
I arranged the clothes on the new racks and filled the baskets on top of the racks with items like socks, underwear and small clothing items that don’t hang well.
I realized pretty quickly that we also needed a little drawer space. So, I purchased a couple of small nightstands, one for each side of the room. Perfect fit!
We hung the new ceiling light, organized the shoe racks, added some hooks on the walls, cleaned up the shoe closet and laid down the new area rug.
The one piece of furniture that survived the old dressing room was a bench that I’ve always loved. I changed out the fabric on the seat and we were good to go.
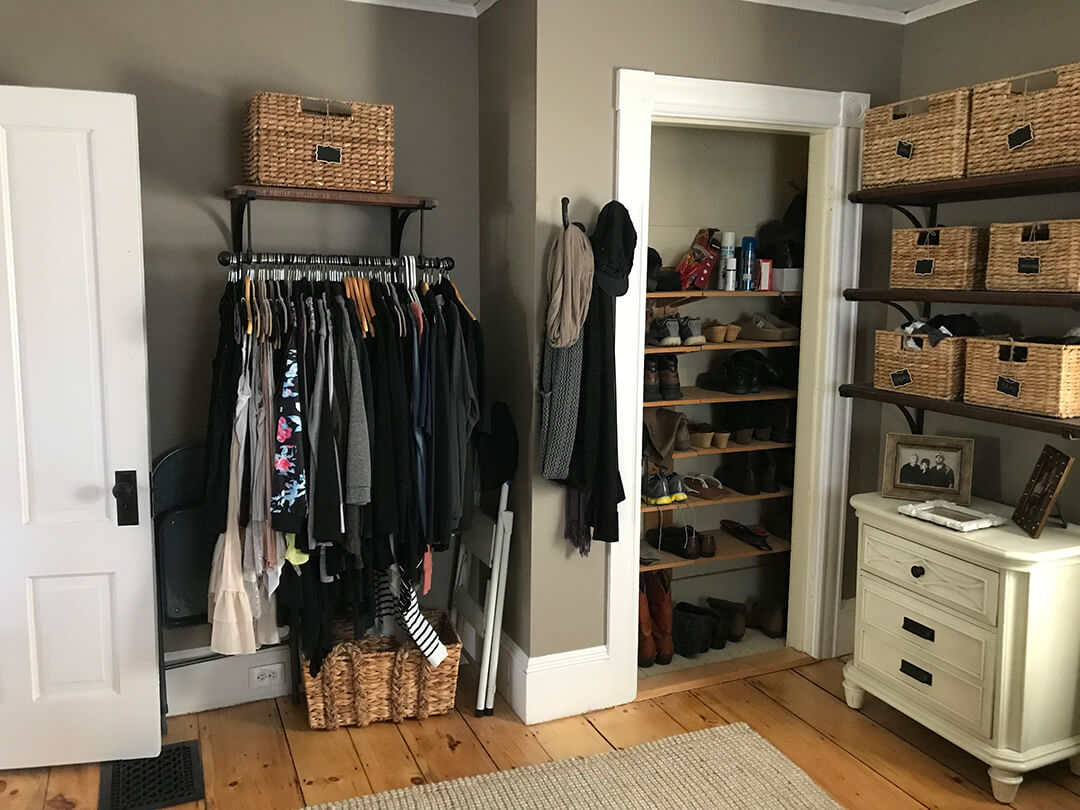
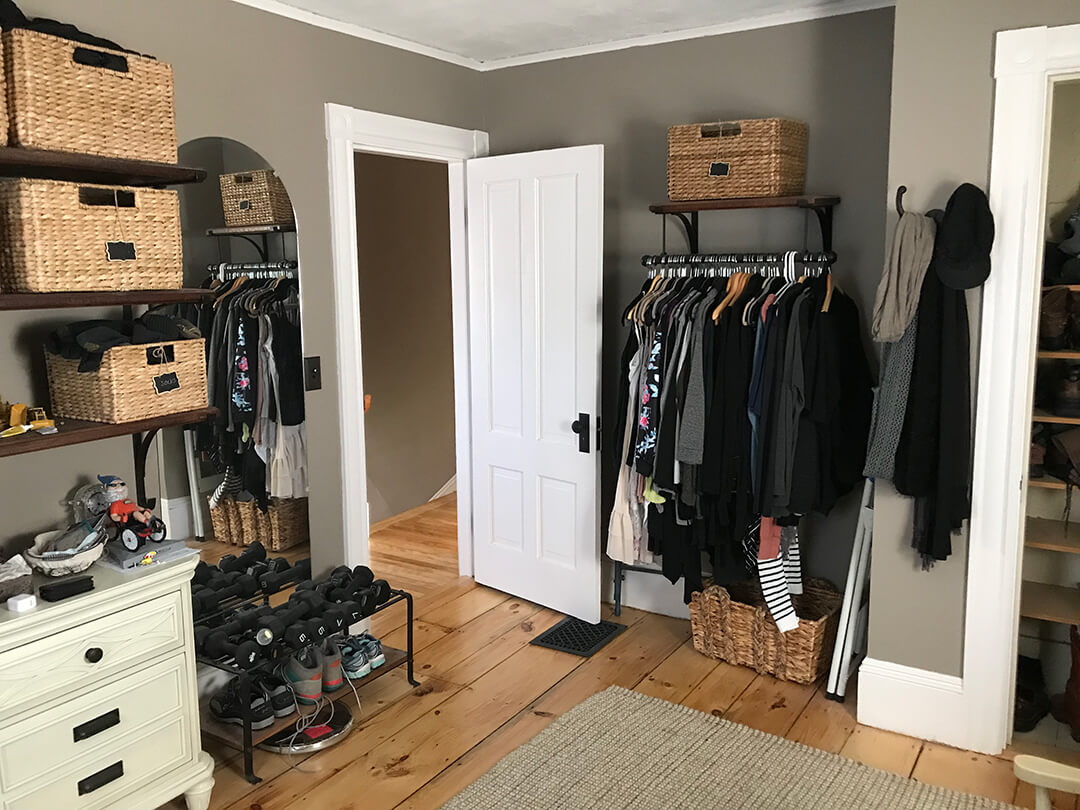
Roomview
Here’s the room, from the 4 corners of the room

features I LOVE
Hover over the images for details (unless you’re on mobile, then tap on the image).
Dressing Room Trunk
If you've been following along you know I'm a little 'trunk happy.' This room did not escape adding one! See shopping link below.
Side table
Two identical side tables, one for each of us, added just enough table top and drawer space.
Bench
I've had this bench forever, but took an hour to change out the fabric and it was like brand new.
Racks and baskets
The racks are beautiful and functional and the baskets are perfect for all those items that are not easily hung. See link below.
Dressing room shoe closet
We converted the existing closet in the room to one with shelves, perfect for most of our shoes.
SHOPPING links
For shopping links, click here (separate page)
For more information
How about you?
Do you have a favorite area or room in your house that you’ve renovated? I’d love to hear about it. Please share in the comments below!