Installing Ceramic Tile

Last updated Jun 8, 2018 | Published on May 8, 2018 | Re-modeling, Tutorial

Tile is a great option, and it can even be cheaper to purchase and install then linoleum – if you install the tile yourself. Do it right and it will last a really long time and it’s a beautiful option. It’s also not that difficult to install, with a little direction. Except for our kitchen floor we installed all the tile in our house ourselves, saving a LOT of money in the process.

If this is something you’re considering, here’s how to do it.

TOOLS & MATERIALS

level
wet saw & extra blades
floor sealer (for bathrooms and laundry rooms)
underlay – backerboard or red guard mat
ceramic tile
mortar
grout
grout sealer
pails
tile separators
large sponges

STEP 1: Measure your space in square feet, then select your tile & grout
You need to purchase 10% – 20% additional tile than the measure of your space to allow for waste.

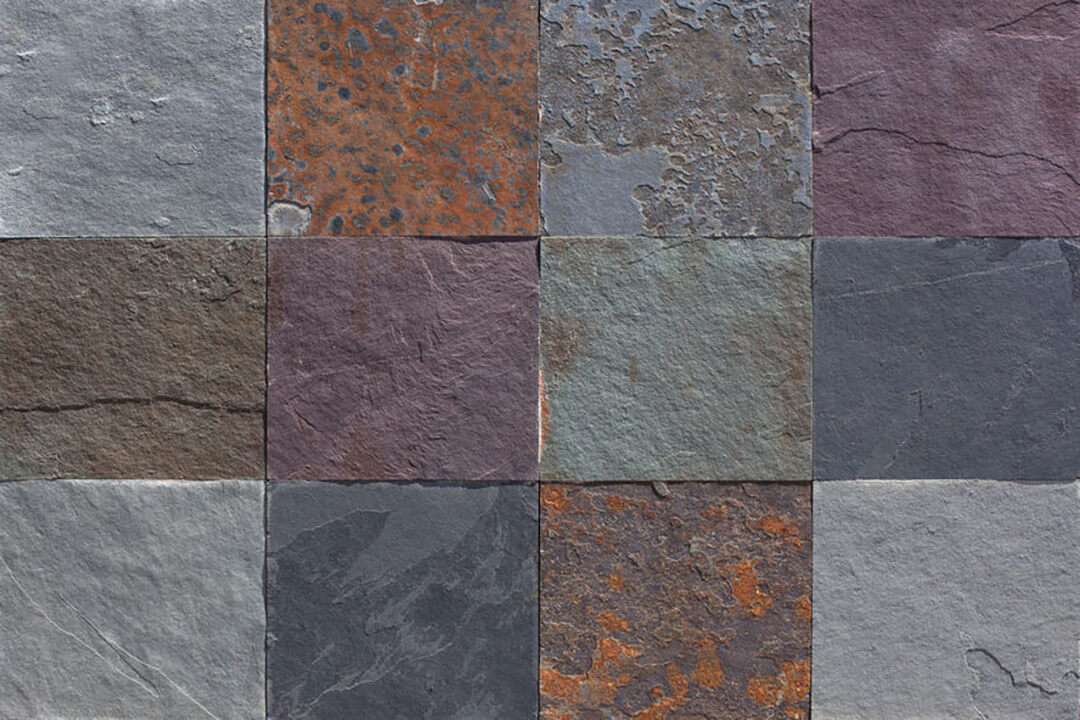
There are lots of choices – take into consideration the size of the tile, style, color, texture and price. I always found it helpful to select the tile ‘in person.’ It’s difficult to tell what a tile is actually like unless you can see and touch it. Select a grout color to coordinate with the tile while you’re at it.

DIY house projects

STEP 2: Lay down a new subfloor if necessary
The subfloors in almost all our rooms were really choppy. We made sure we cleared them of nails and brads and layed down a new plywood subfloor so we’d have a clean surface to work with. We did this everywhere we did not use backerboard (see Step 4).
STEP 3: Make sure your floor is level

Since we have an old house, it’s rare when the floors are level. You can use leveling strips or additional mortar to level things out.

STEP 4: Lay down an underlay
For ceramic tile, you can either lay down backerboard (cement board) over the subfloor or a product we found that is called Air Guard Mat.

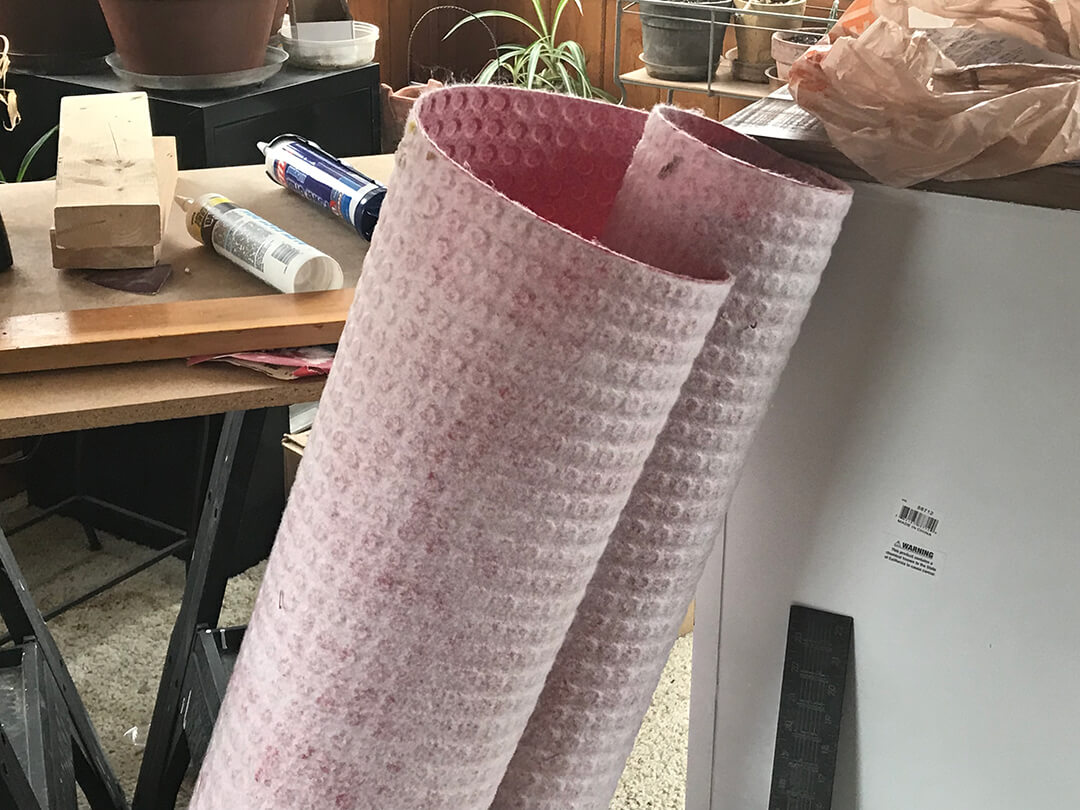
The problem with cement board is that it’s almost impossible to cut. We went that route with the backsplash in the kitchen and the downstairs bathroom floor, but after using the Air Guard once we’re convinced it’s the better way to go. It’s easier to work with and costs no more than backerboard.

Here’s what a roll of the Air Guard mat looks like. You just need to cut it to fit the size of the area.

DIY house projects

STEP 5: Seal the floor (optional)
We sealed the floor in the bathroom and the laundry room, since they are both rooms that could possibly leak or flood. This was an added protection, one we didn’t use in other rooms such as the kitchen.

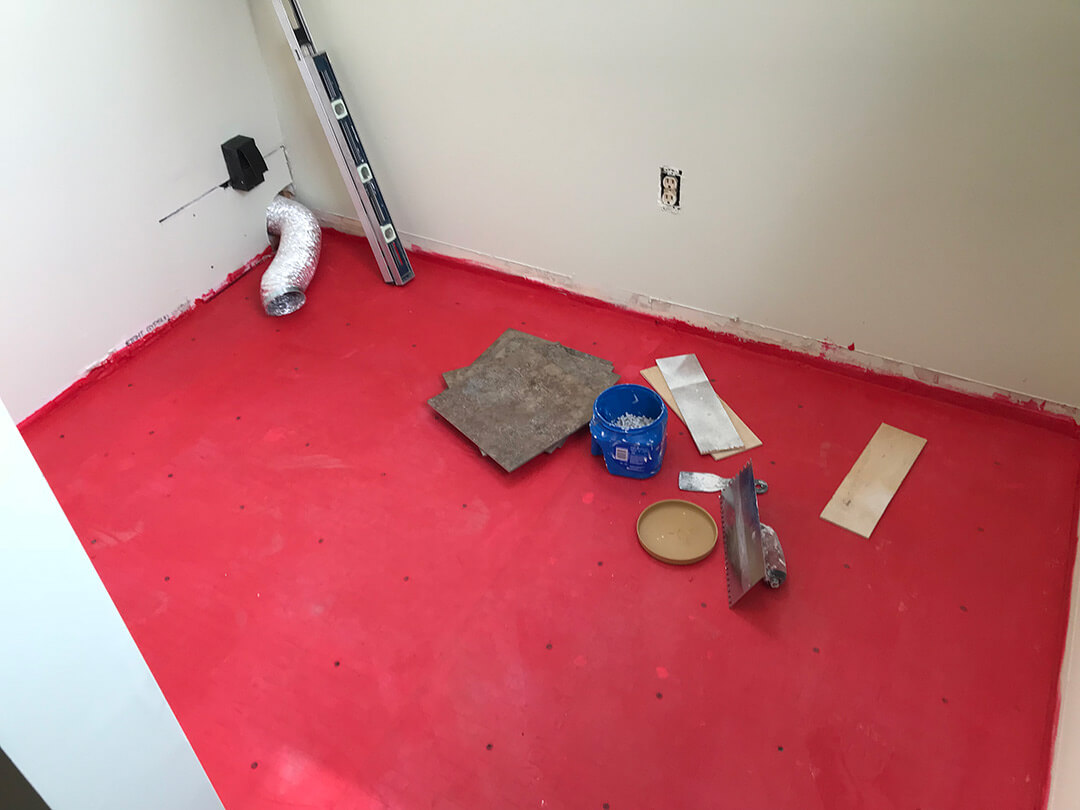
If you use backerboard, the sealant goes right over the backerboard. If you’re using the Red Guard Mat as the underlay, the sealer goes over the subfloor.

diy house projects

STEP 6: Decide on a tile pattern and lay out your tile
I guess this is the most artistic part of tile installation. You need to decide, based on the size of your space and the size of the individual tiles, how you want your tiles to lay.

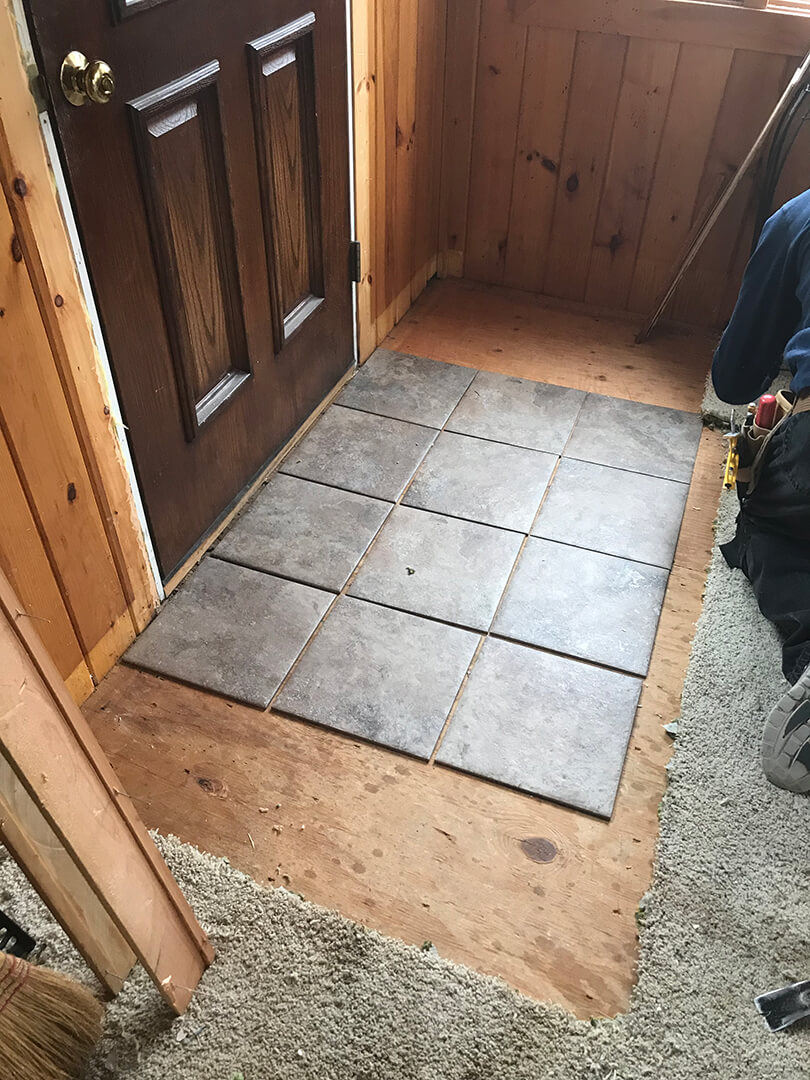
For instance, when you first walk into the room you probably want to see full tiles stretching out before you. Then you cut the tiles to the side to fit.

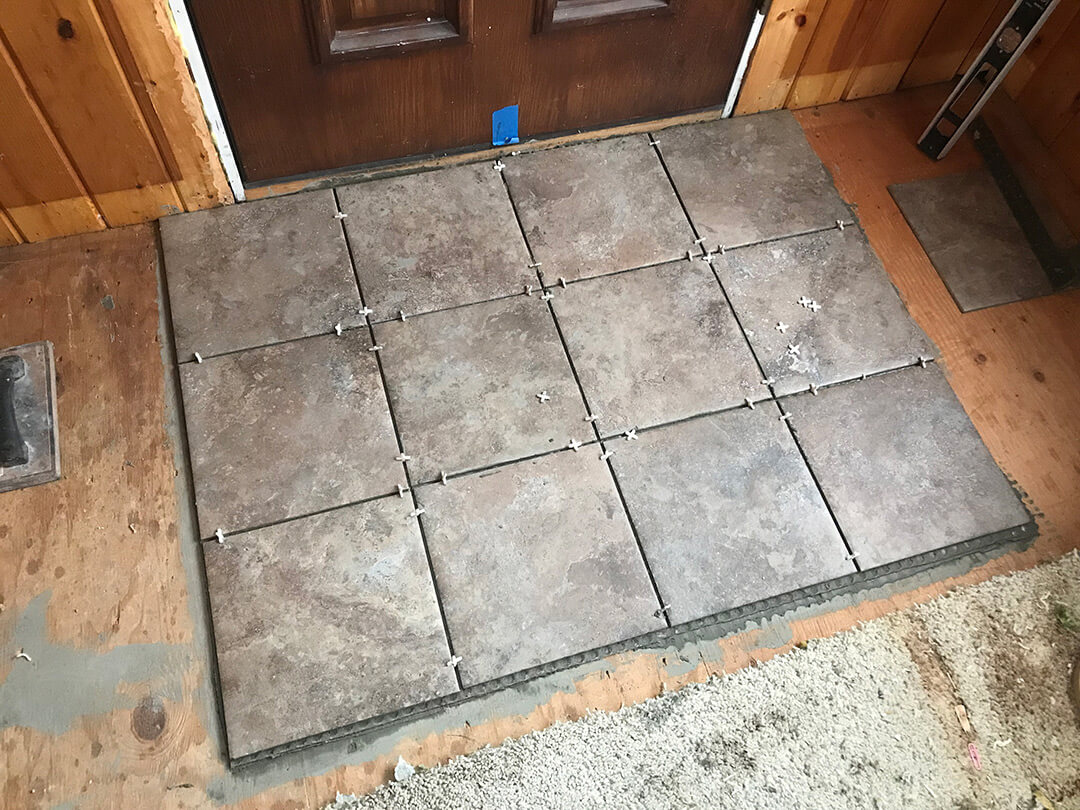
Working in a section at a time if your space is big enough, lay out your tiles as you want them to be. The tile job below was fairly easy since there were no tiles that needed to be cut. Unusual!

Once you’ve layed them all out, use spacers to settle on the final pattern and cut any tiles with the wet saw to fit.

DIY House Projects

STEP 7: Move tiles out; mix & spread mortar over underlayment

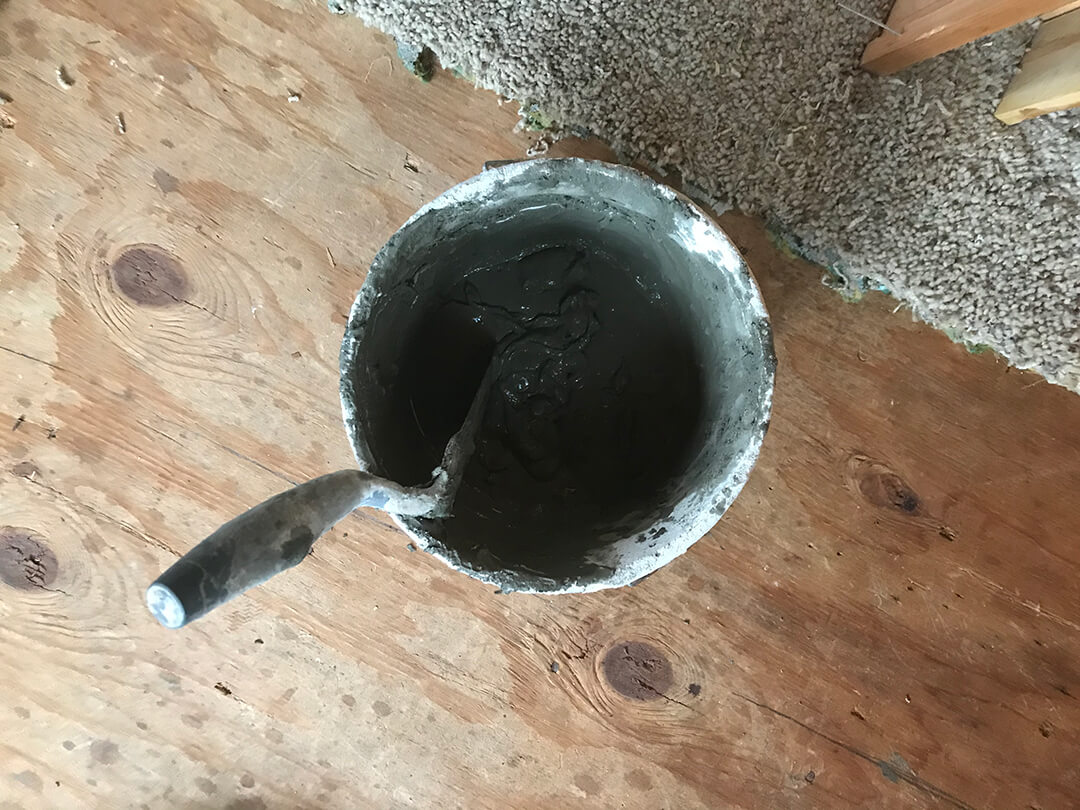
Be sure to remember which tiles go where (it can help to number them on the back). Move them out of the space so you can lay down the mortar. Spread it evenly over the underlay.

DIY House Projects

STEP 8: Lay tiles on mortar per your pattern
Once the mortar is spread, lay the tiles down on it in the pattern you established. Use the spacers to be sure that the tiles are even. We used 3/16 inch spacers, but there are a variety, depending on how large a space you want to have between the tiles.

DIY House Projects

STEP 9: Let tiles & mortar set overnight
STEP 10: Mix & lay down grout over tile
Mix the grout and lay it down with a large sponge over the tile, making sure that the grout gets into all the spaces between the tiles and between the tile and the wall. Clean it with clear water when you’re done.

DIY House Projects

STEP 11: Let grout dry overnight
STEP 12: Apply grout sealer
Apply grout sealer just to the grout (it’s kind of a tedious task). Doing this will keep the grout from getting dirty or stained. Let it sit for at least a few hours, overnight if you can.

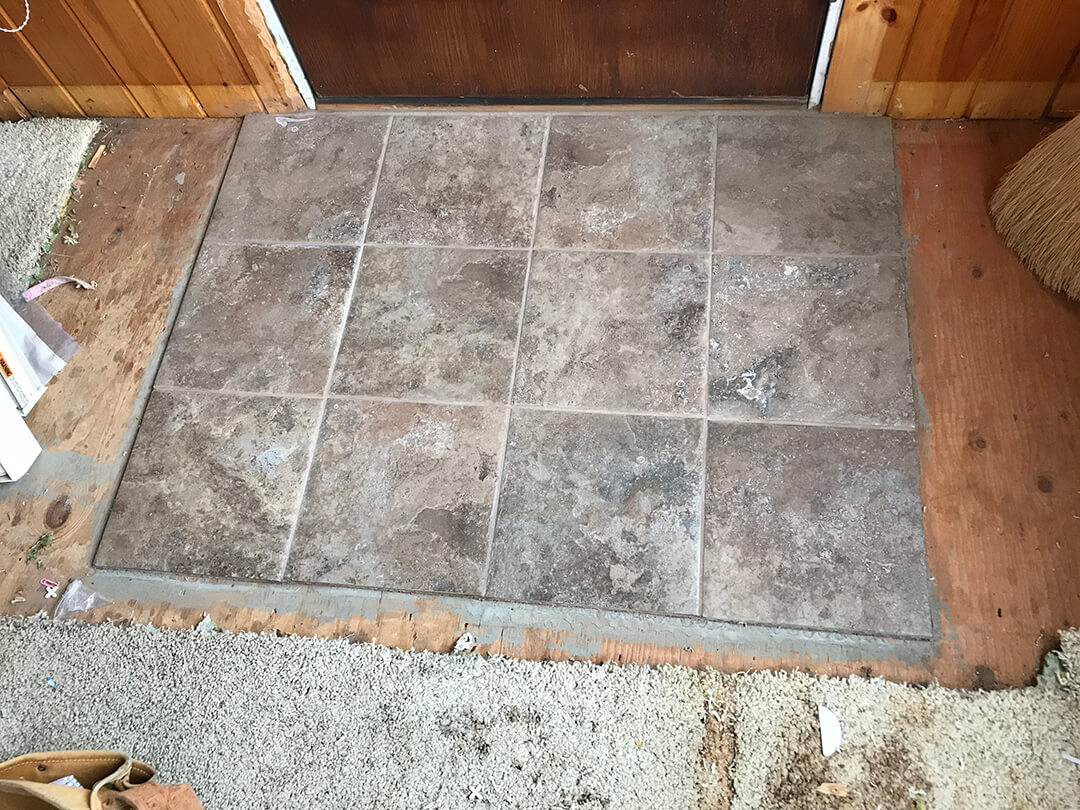
Here’s the finished tile for this particular area. It’s pretty and hides the dirt really, really well. We love it!

diy house projects

For more information

Visit the following pages for more information about the tiling we did in these rooms:

How about you?

Done any tiling? I’d love to hear about it. Please share in the comments below!

Pin It on Pinterest

Thanks SO much for reading!

Are you enjoying this article? If so I would appreciate the heck out of it if you shared it. These icons will help...