
Floor Demo – Taking up 3 (Plus) Layers of Kitchen Floor & the Cabinets
The very first thing we had to do was take up the floor.
We initially didn’t even know how big a problem we had. The kitchen floor was considerably higher than the adjoining floors so we knew it would probably be a challenge.
We weren’t wrong.
Step 1 – Let’s Investigate
The first thing we did was to gauge the size of this project.
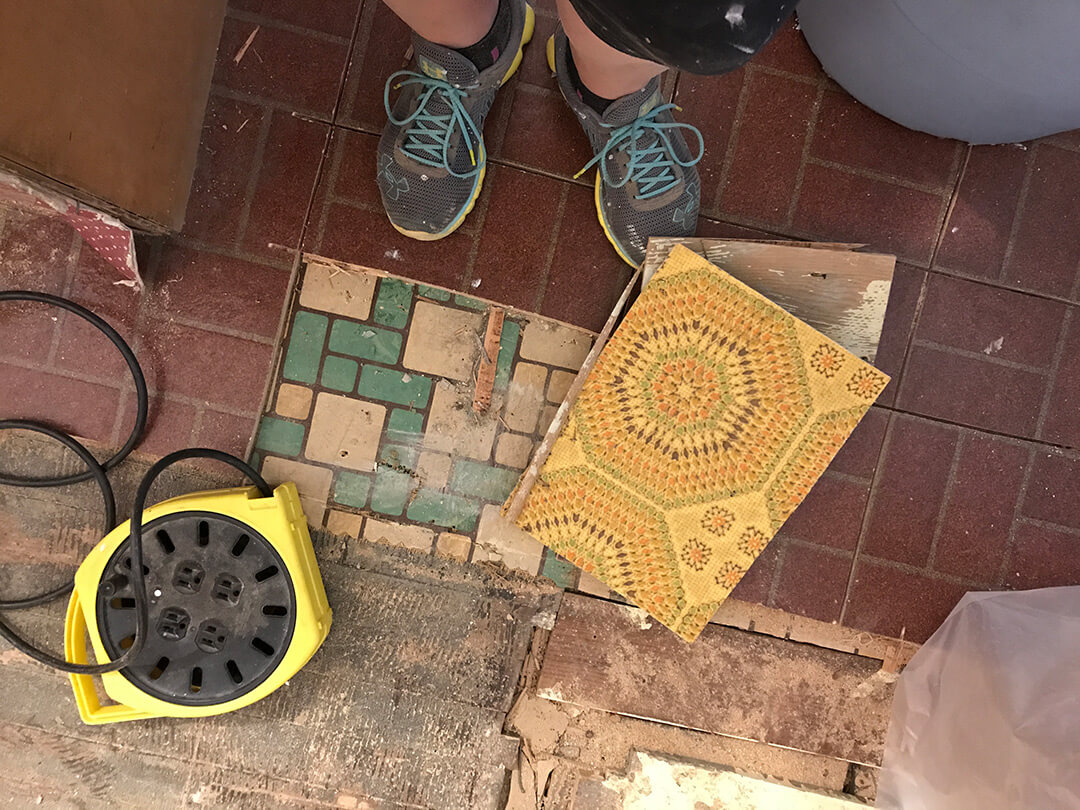
To do that, we had to take up a small section of the floor in a low traffic area to see what exactly was underneath.
We found 3 layers of floor along with the plywood in between.
The most interesting part about remodeling an old house is discovering what’s underneath.
You can see by the picture that floor decor has certainly changed in the last half century or so!
Step 2 – Take up the ‘Free’ Floor
We were trying to keep our kitchen functional for as long as possible, so we took up the floor in stages.
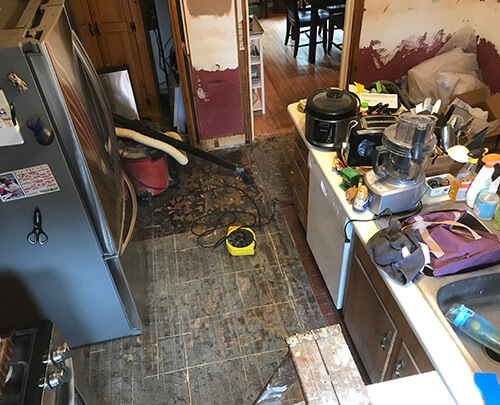
First, we worked on all the floor not covered by an appliance or cabinet.
I have to tell you that this was one dirty job.
We knew it would be so we taped plastic around all the door openings and covered everything in the kitchen with drop cloths while we worked.
1. Dom used a circular saw to cut the floor up into 1-foot-square pieces.
2. He then used a crowbar to get underneath and pull up the section.
3. I then pulled out all the nails and staples left behind, cleaning up the debris as we went.
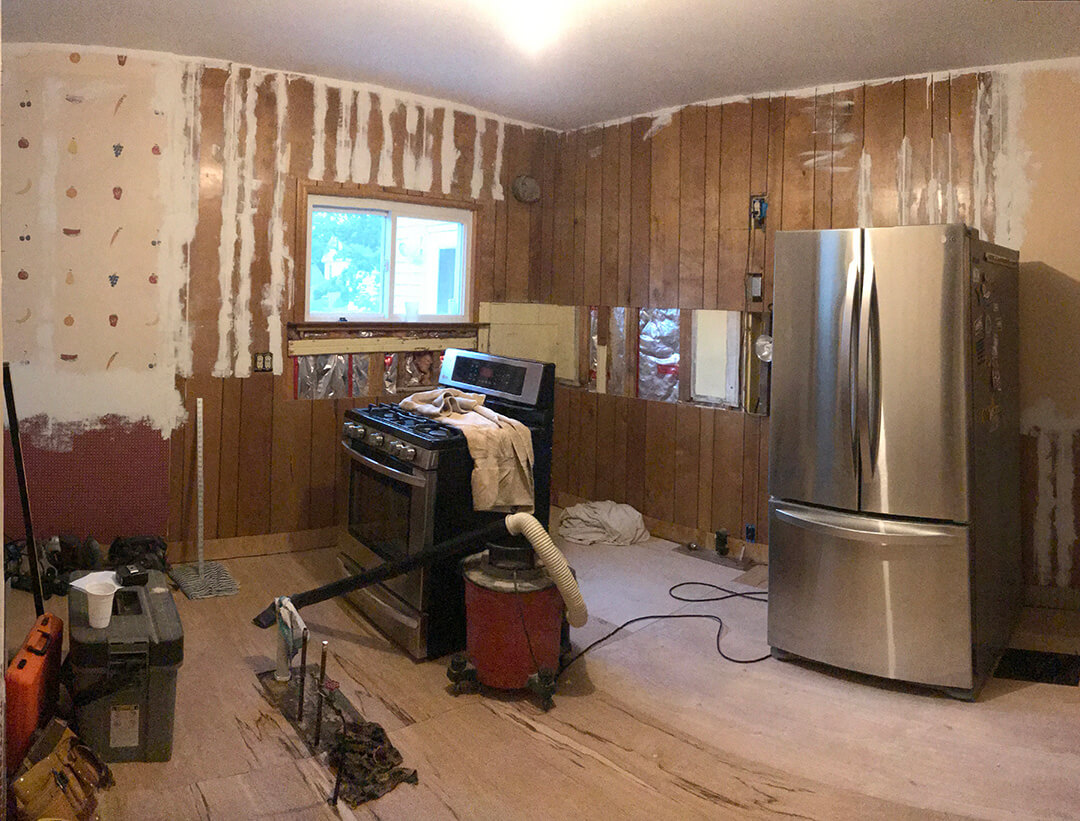
You can see by the picture that at this point we had removed all the floor we could see.
So we had gone as far as we could without demo’g a cabinet.
Every night we would clean up, clear the counters and put all the equipment to the side. This allowed us to continue to cook dinner in what was a messy but still-functioning kitchen.
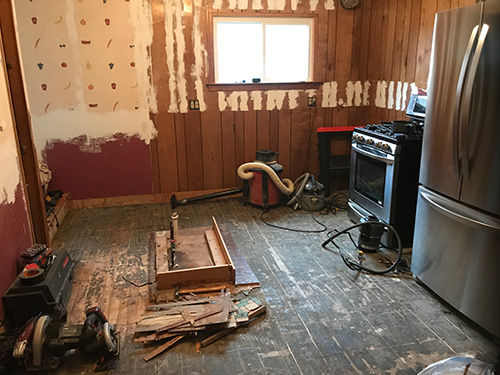
Step 3 – Demo Cabinets & Remaining Floor
The next step was to start to demo the cabinets. For more information on how we installed our kitchen cabinets, click here.
After each cabinet demo, we’d remove the floor underneath, same process as before, 1 square foot at a time.
We started with the cabinets that we could most live without.
One by one we got to all of them, saving the sink cabinet for last. We knew that once we lost the sink, the kitchen would become almost completely non-functional.
Demo day for us turned into demo 2 weeks. And it wasn’t fun like you see on TV, at least not for us.
And what’s with those funky walls? Read about how we painted over all that here.
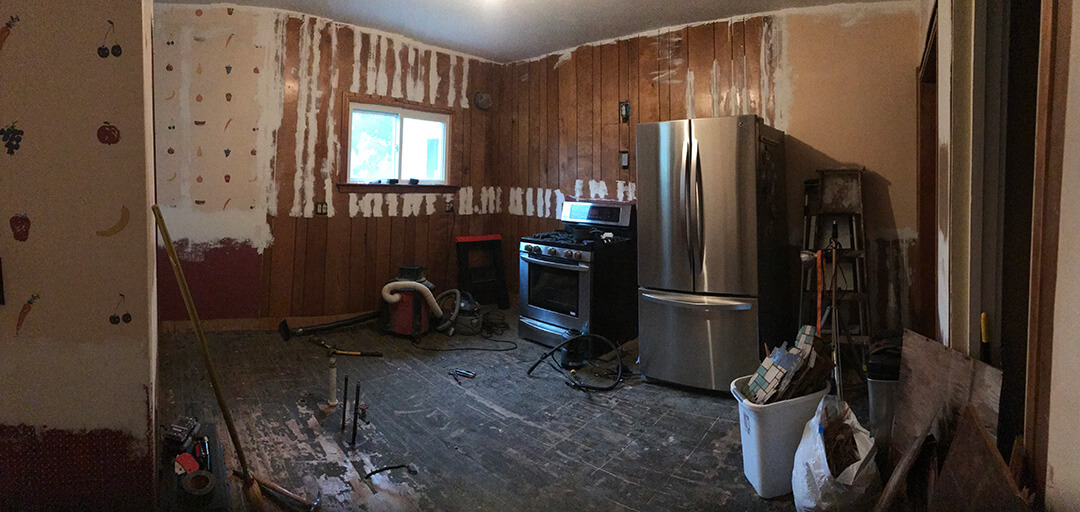
Floor demo complete
The last old cabinets and the rest of the floor are now gone.
At this point the refrigerator and stove were still functioning (Godsend!). But, cooking in the kitchen was pretty much on hold.
Prepared foods and eating out was the name of the game.
It was time to move on to the next step.
Step 4 – Plywood Base
The last step before moving onto the cabinet installation was to lay down fresh plywood.
We agonized over this a bit because we didn’t think it would go smoothly. We were frankly a little worried about how level the floor was – with good reason.
Off to home-away-from-home Home Depot.
A little more than a day later, with help from brother-in-law Bob, we had a brand new plywood floor. We did have to make sure the floor was fairly level. In an old house that’s a challenge, and ours had a definite slope but it was workable.
Having a fresh floor, even if it’s not the final floor, was close to heavenly. See the image below.
Even better was knowing that we were one step closer to getting back a functioning, better than ever kitchen. On to the cabinet installation!
For more information
About the rest of our kitchen projects and after pictures, visit our Tour My Kitchen page.
How about you?
Have you ever taken up a floor or done remodeling work on your kitchen? I’d love to see and hear about it!