TOUR MY
Breakfast Nook & Laundry
We completely changed this space.
This is a picture of the room as it used to be. Though I liked the idea of this room, there were lots of issues:
- It was crowded.
- This was not the best use of space given it’s off the kitchen (what the heck is an office doing here?)
- The small bathroom, located on the back side of this room, was only a half bath with a tiny laundry.
All the problems created an opportunity to do something really different here. So this is what we did:
- Moved the laundry out of the bathroom to where the breakfast table had been; we created a partial wall and put the laundry behind it.
- Moved the office upstairs.
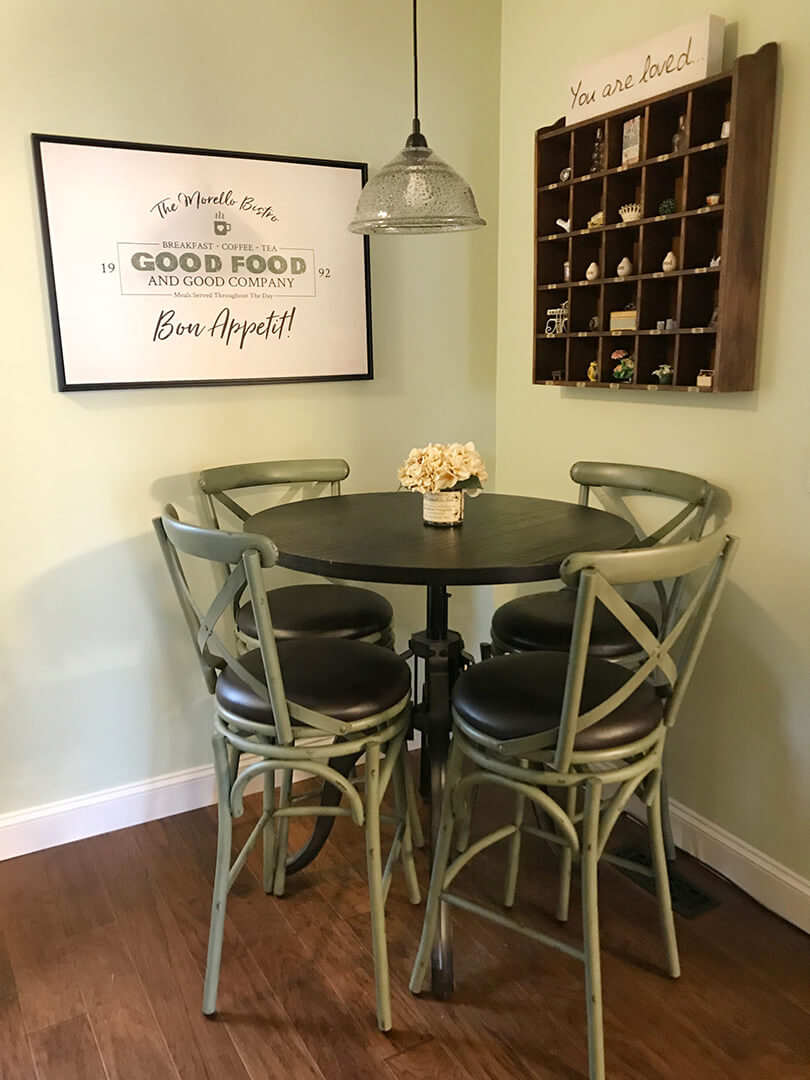
- Got rid of the breakfast table we had, purchased a set that fit better and moved it to where the office had been.
- Added a shower to the bathroom and completely moved everything else around in there. See the downstairs bathroom page for more information about how we improved that room.
This was a complicated renovation. There was a bit of everything and it all had to be timed. Here’s all the details about what we did and how we did it.
Topics covered here
Overview
Before & Afters
All the Details
Room Views
Features I Love
Shopping Links
PROJECT overview
JUST THE FACTS, MAM
![]()
We saved some money here, but we spent some, too! We installed a click lock hardwood floor ourselves (it was surprisingly not that difficult to do) and saved a lot of money there. The biggest other expenses were the bistro table and chairs and some wall art, which were a splurge. But I love them.
COST BREAKDOWN
Paint Supplies: $60
Flooring: $700
New (baseboard) trim: $150
Hardware: $200
Lighting Fixtures: $206
Furniture: $920
Window Treatments: $132
Wall art: $557
Decor: $238
TOTAL: $3275
Money doesn’t grow on trees. So how did we pay for this? Check out my post 6 Ways You Can Finance Your Renovation and I’ll fill you in!
Time to complete: 1 month’s work over 6 months
The work was a bit of start and stop, since we were waiting for work on the bathroom to be done.
July ’17 Moved the office upstairs.
Jan – Mar ’18 Cleaned out the room, pulled up the carpet and (the carpenter) built the partial wall.
Mar – Apr ’18 We painted the walls, installed the hardwood floor in the nook and the tile in the laundry, new baseboards all around, and thresholds.
Problems & Challenges
The biggest problem we had with this room was timing – waiting for the bathroom work to be done. Then we ran into a problem with the wall that the carpenters built, it was not straight and needed to be fixed. It felt like it took forever to get this room done.
For (non-affiliate) links to my purchases, see Shopping Link section below
Improvements? How do I count them all??
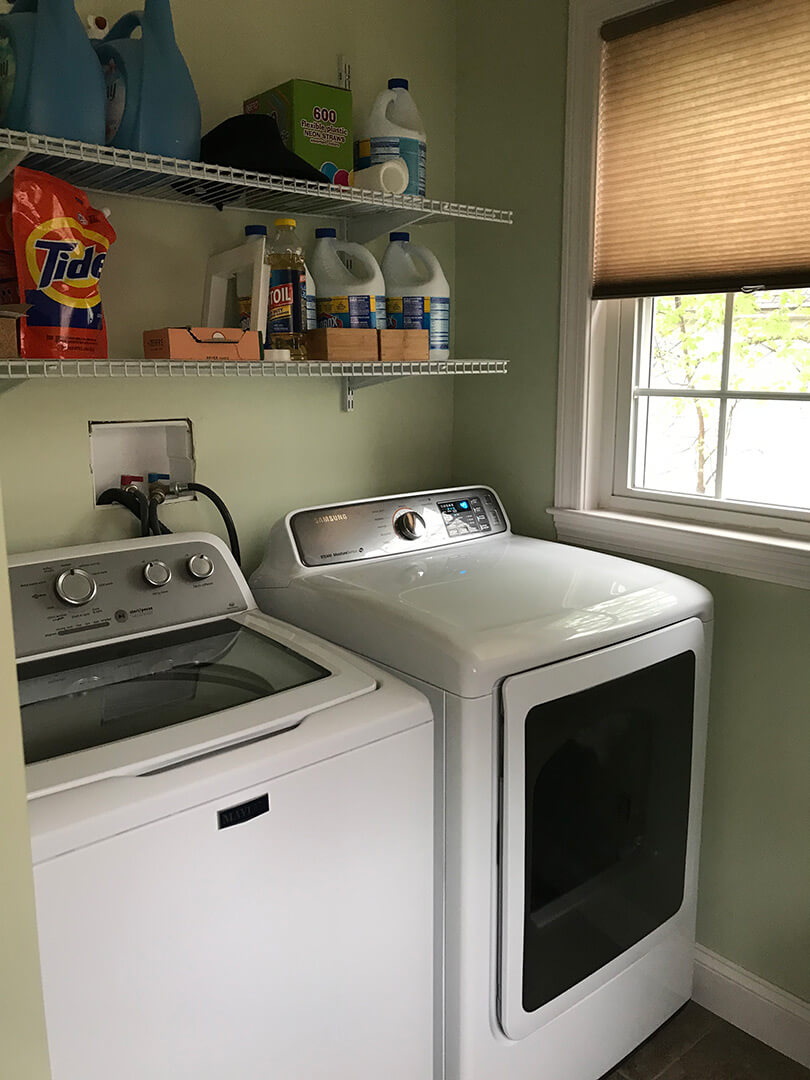
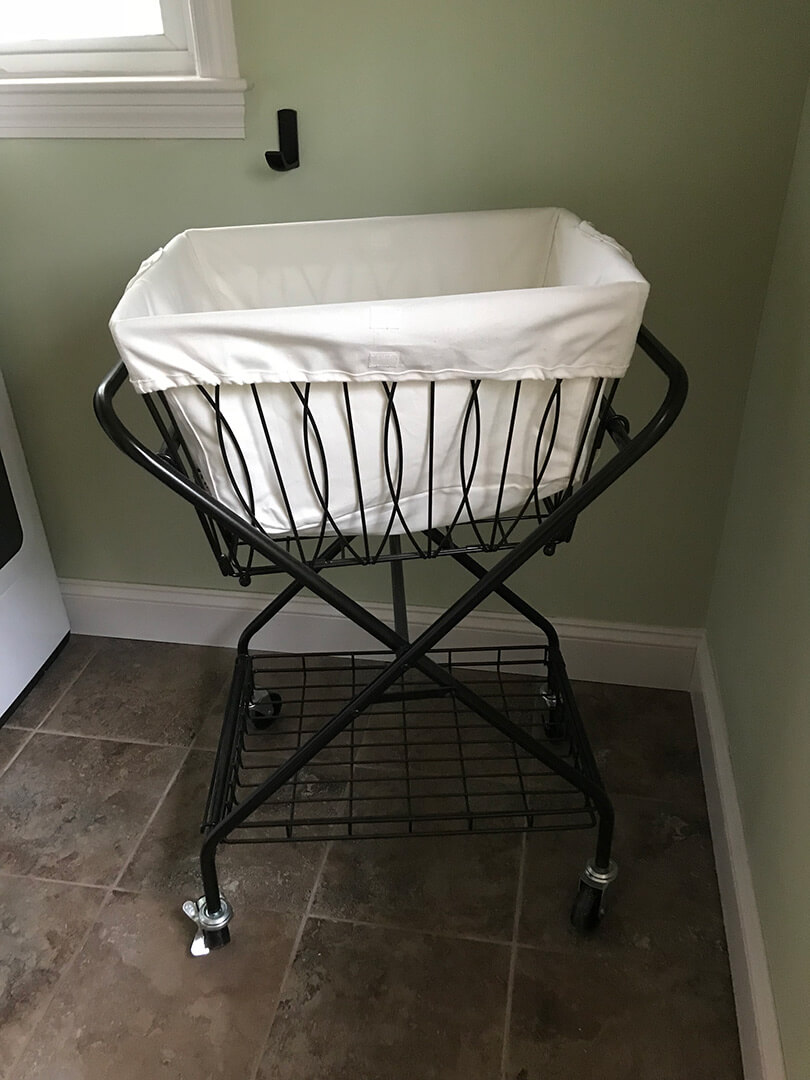
- The laundry used to be in a really bad, cramped spot in the bathroom and getting laundry done was an event. The new laundry room is small but incredibly efficient, with everything I need within arm’s reach. Doing the laundry now is a breeze, almost a pleasure!
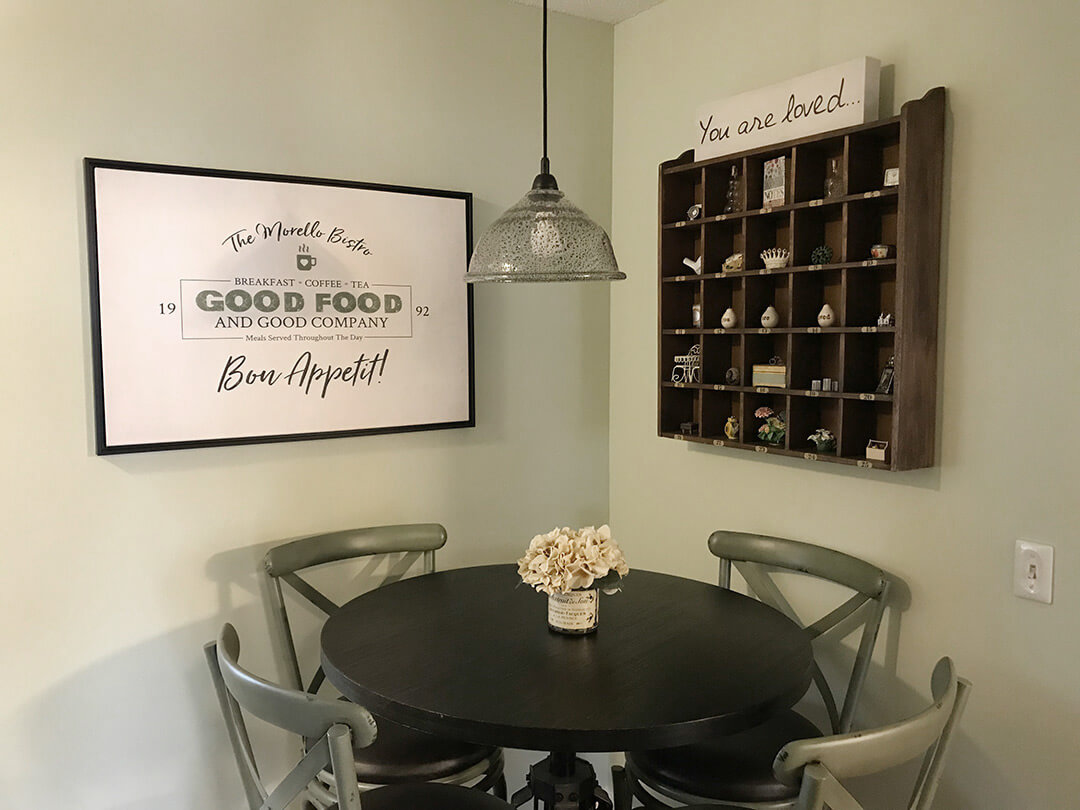
- The old nook was crowded and difficult to get in and out of so we seldom used it. The new nook is a small but intimate and handy to get to.
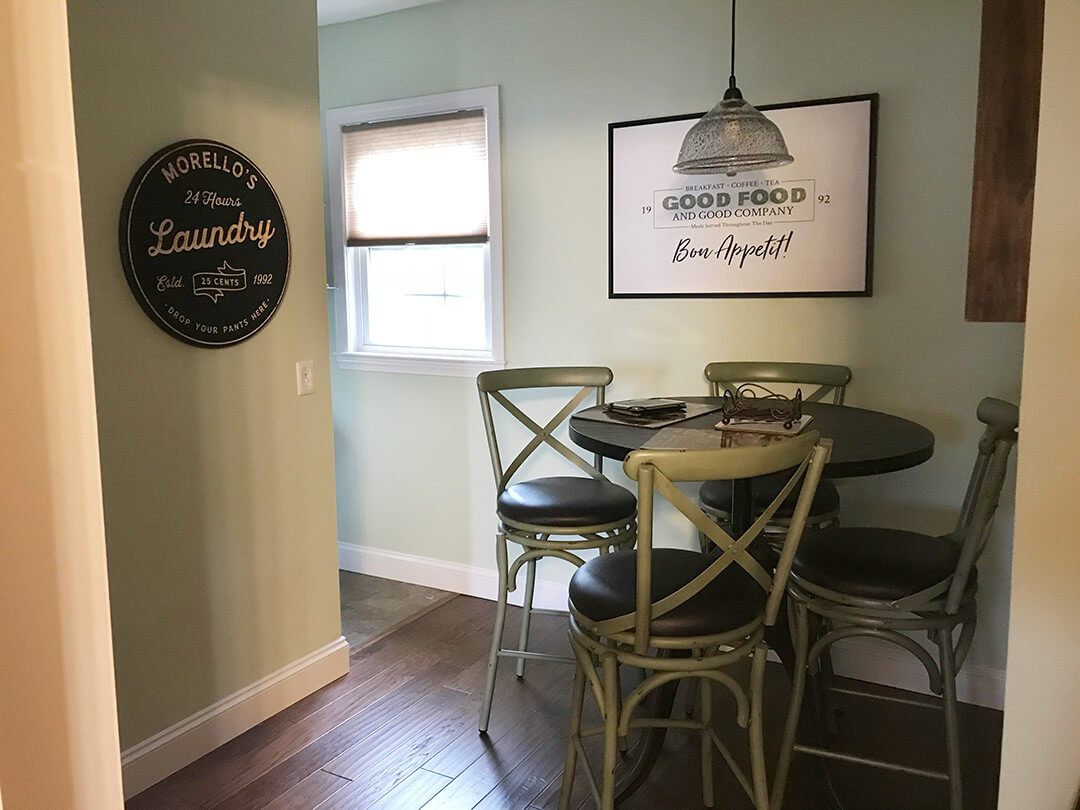
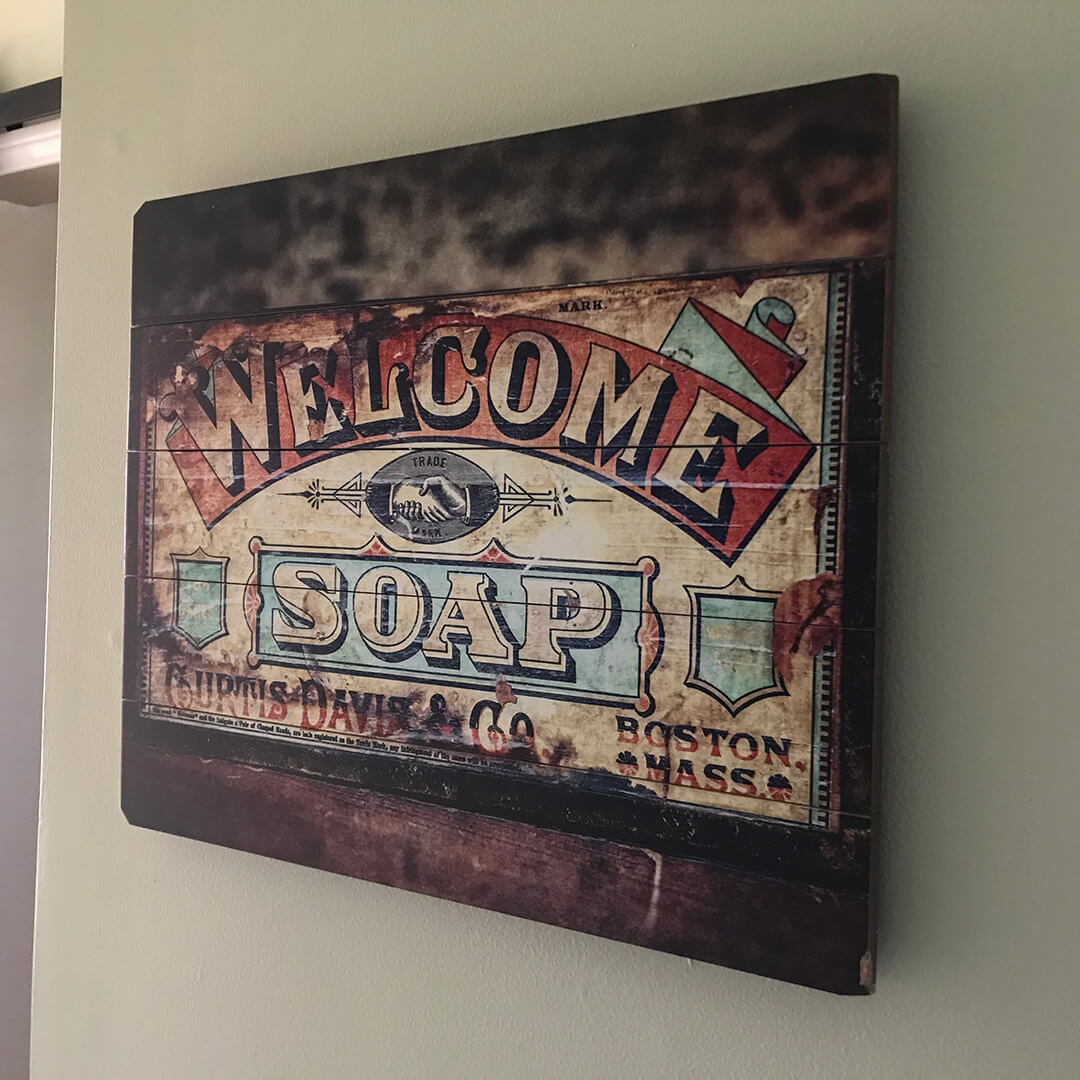
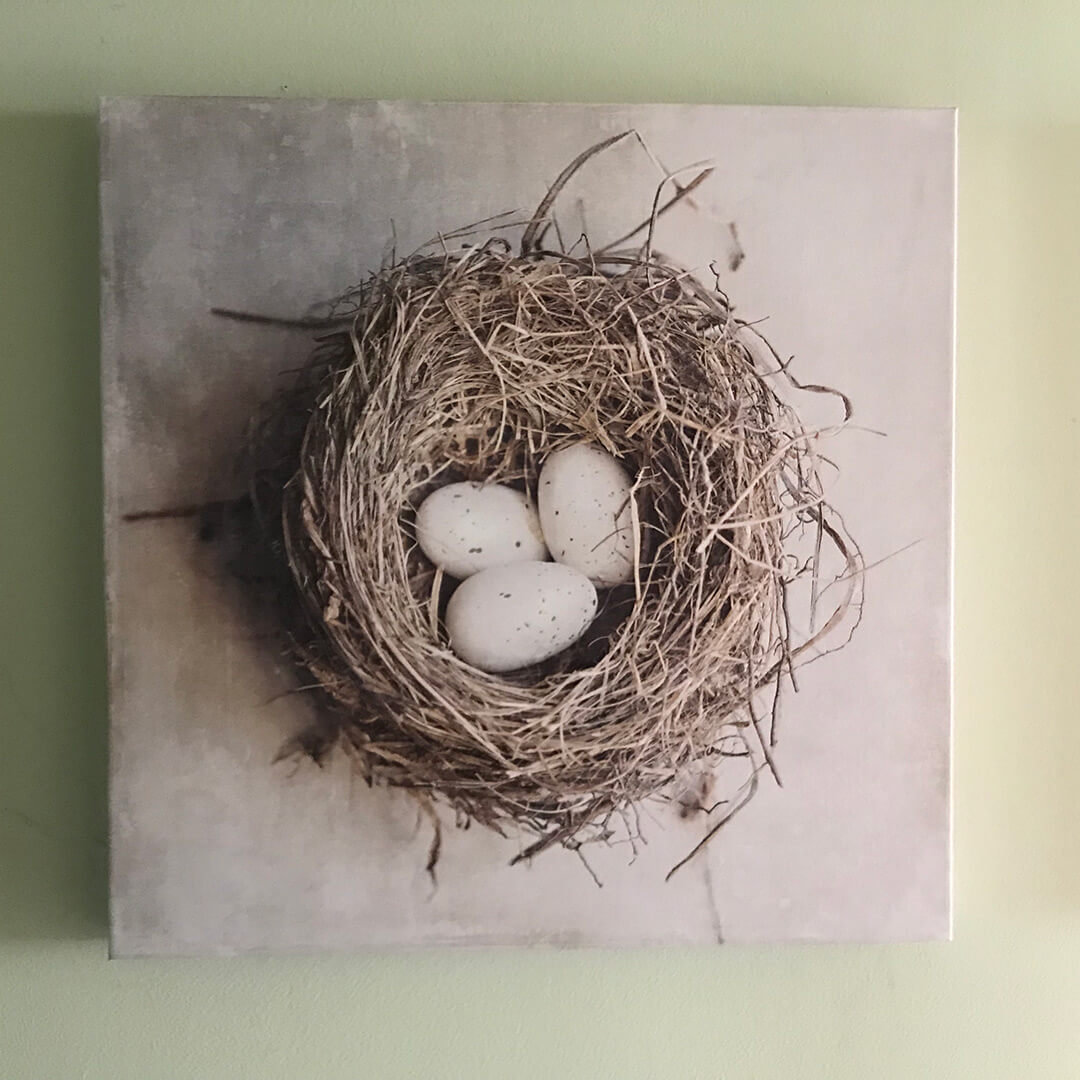
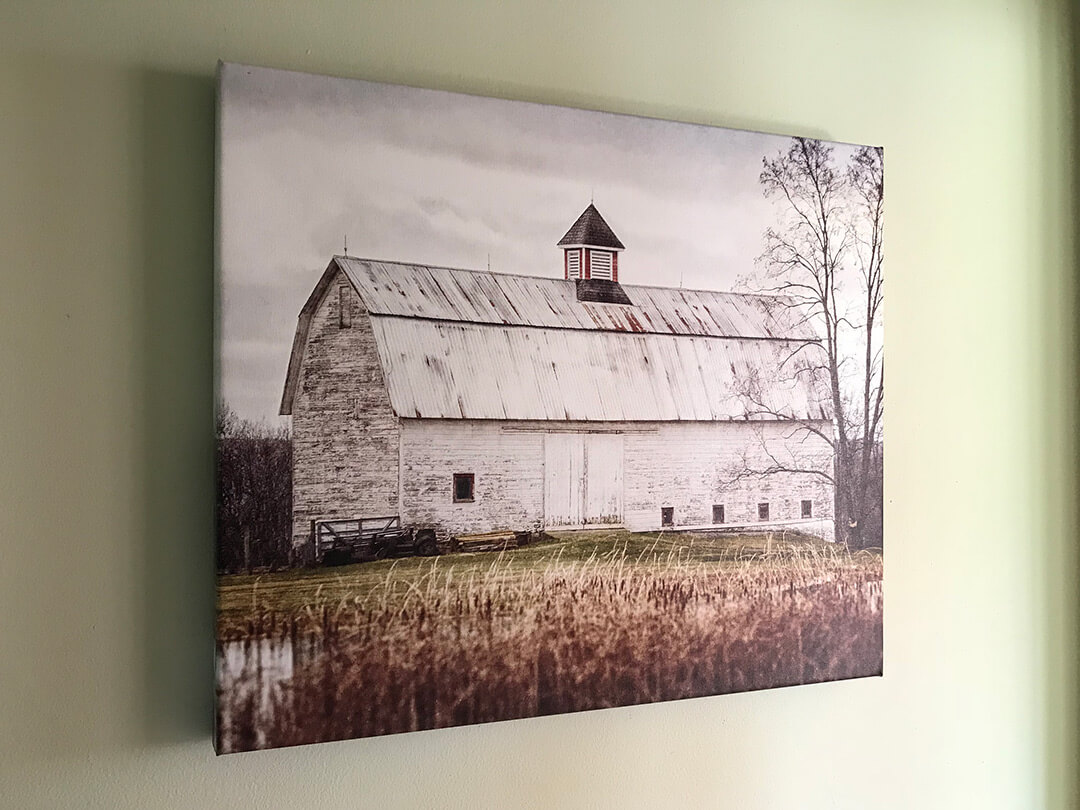
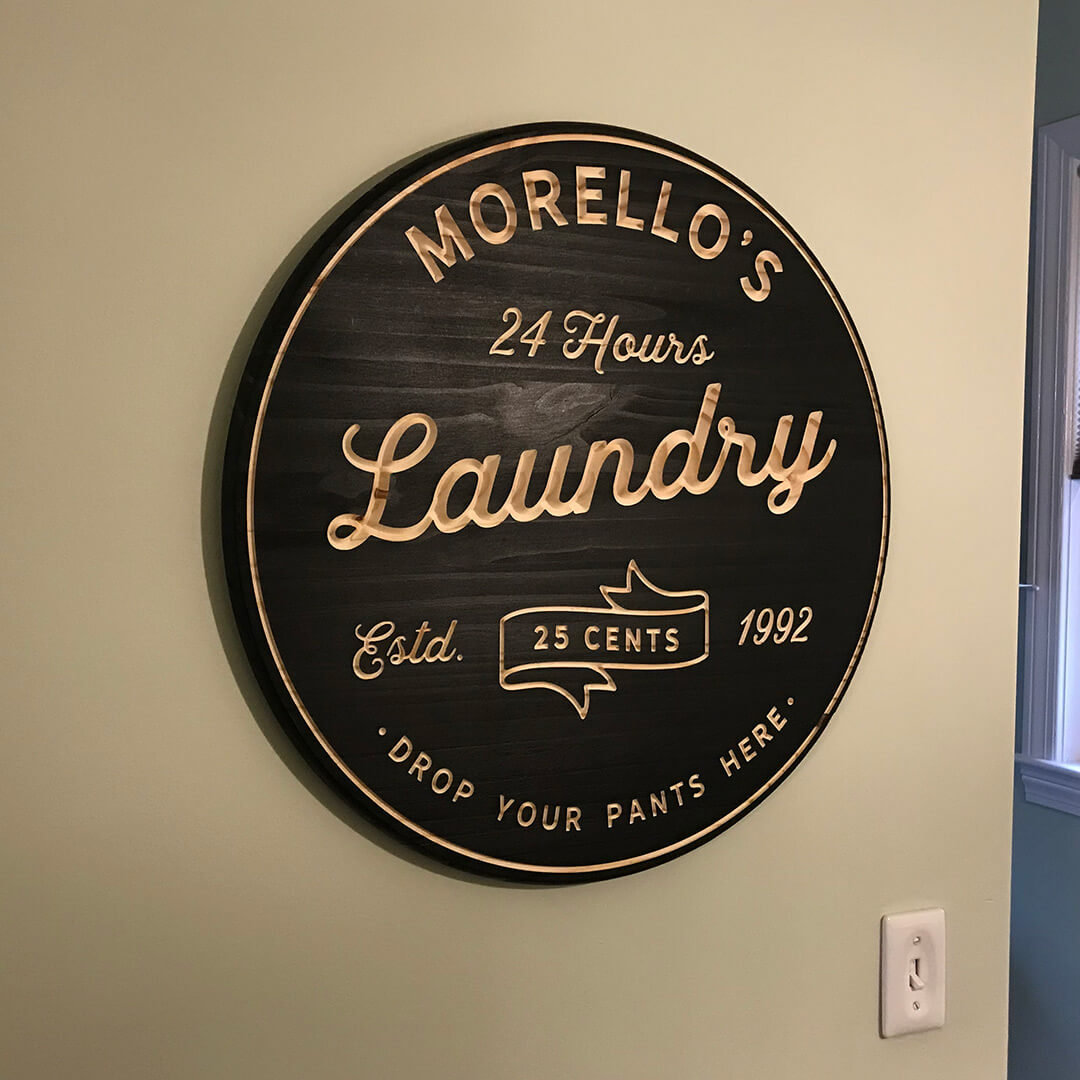
- I either carefully chose or created all of the wall art. It either amuses me (the laundry sign), makes me proud (the bistro sign that I created), or makes my heart light (the landscape art along the hallway wall and the cubby wall piece).
- Everything flows together so well, from old hardwood in the dining room to the tile in the kitchen, to the hardwood in the nook, to the tile in the laundry room. Very feng shui (just like the name of the paint color lol).

Paint

Cost
We saved some money here, but we spent some, too!
We installed a click lock hardwood floor ourselves (it was surprisingly not that difficult to do) and saved a lot of money there. The biggest other expenses were the bistro table and chairs and some wall art, which were a splurge. But I love them.
COST BREAKDOWN
Paint Supplies: $60
Flooring: $700
New (baseboard) trim: $150
Hardware: $200
Lighting Fixtures: $206
Furniture: $920
Window Treatments: $132
Wall art: $557
Decor: $238
TOTAL: $3275
Money doesn’t grow on trees. So how did we pay for this? Check out my post 6 Ways You Can Finance Your Renovation and I’ll fill you in!

Timing
Time to complete: 1 month’s work over 6 months
The work was a bit of start and stop, since we were waiting for work on the bathroom to be done.
July ’17 Moved the office upstairs.
Jan – Mar ’18 Cleaned out the room, pulled up the carpet and (the carpenter) built the partial wall.
Mar – Apr ’18 We painted the walls, installed the hardwood floor in the nook and the tile in the laundry, new baseboards all around, and thresholds.

Problems
Problems & Challenges
The biggest problem we had with this room was timing – waiting for the bathroom work to be done. Then we ran into a problem with the wall that the carpenters built, it was not straight and needed to be fixed. It felt like it took forever to get this room done.

Shopping
For (non-affiliate) links to my purchases, see Shopping Link section below

Improvements
Improvements? How do I count them all??
- The laundry used to be in a really bad, cramped spot in the bathroom and getting laundry done was an event. The new laundry room is small but incredibly efficient, with everything I need within arm’s reach. Doing the laundry now is a breeze, almost a pleasure!
- The old nook was crowded and difficult to get in and out of so we seldom used it. The new nook is a small but intimate and handy to get to.
- I either carefully chose or created all of the wall art. It either amuses me (the laundry sign), makes me proud (the bistro sign that I created), or makes my heart light (the landscape art along the hallway wall and the cubby wall piece).
- Everything flows together so well, from old hardwood in the dining room to the tile in the kitchen, to the hardwood in the nook, to the tile in the laundry room. Very feng shui (just like the name of the paint color lol).
before & AFTER
What a remarkable difference!
It’s a lot less crowded, and a much better use of space, I think you’ll agree.
all the DETAILS
WHAT WE DID AND HOW WE DID IT
Before we really even started work on the room back in mid 2017, we moved the office upstairs as soon as we could. That gave me a better office area and it freed up the room so we could start work on it whenever we wanted.
Around December, we cleaned the room out. The old table and bench was donated to Goodwill. We moved the ladder/shelving unit temporarily to the sunporch.
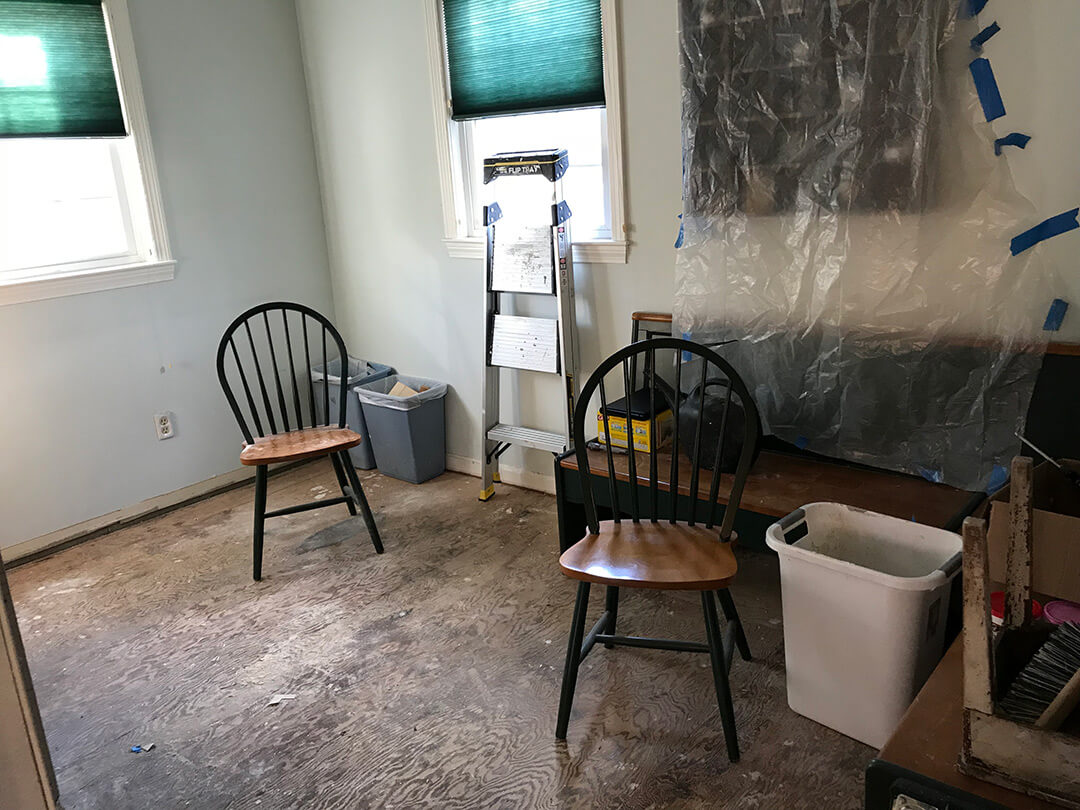
We pulled up all the old carpet and discarded a few thousand tacks and nails, then nailed down a layer of plywood.
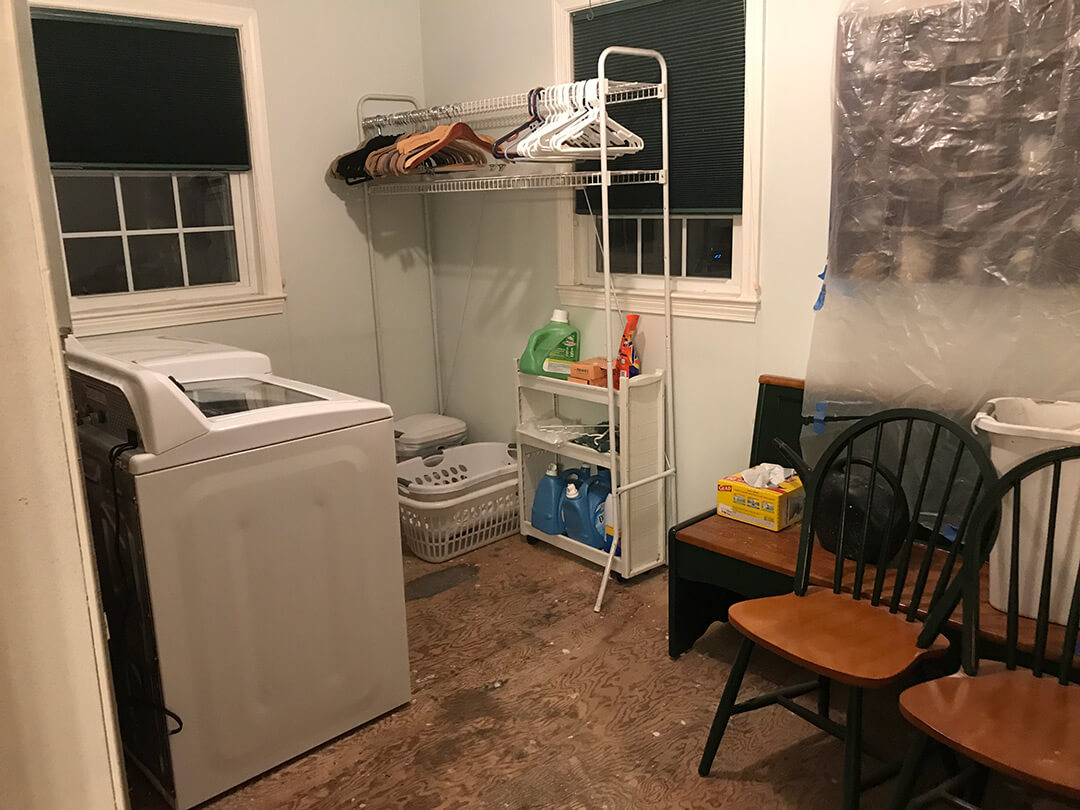
We were working on this room and the downstairs bathroom at the same time. To move the bathroom along we had to move the laundry out of that room to its new location. It was a little rough but still functional, that’s all that really mattered at this point.
See this post for details on how we installed the tile in this and other rooms. Here’s the finished tile. It’s pretty and hides the dirt really, really well!

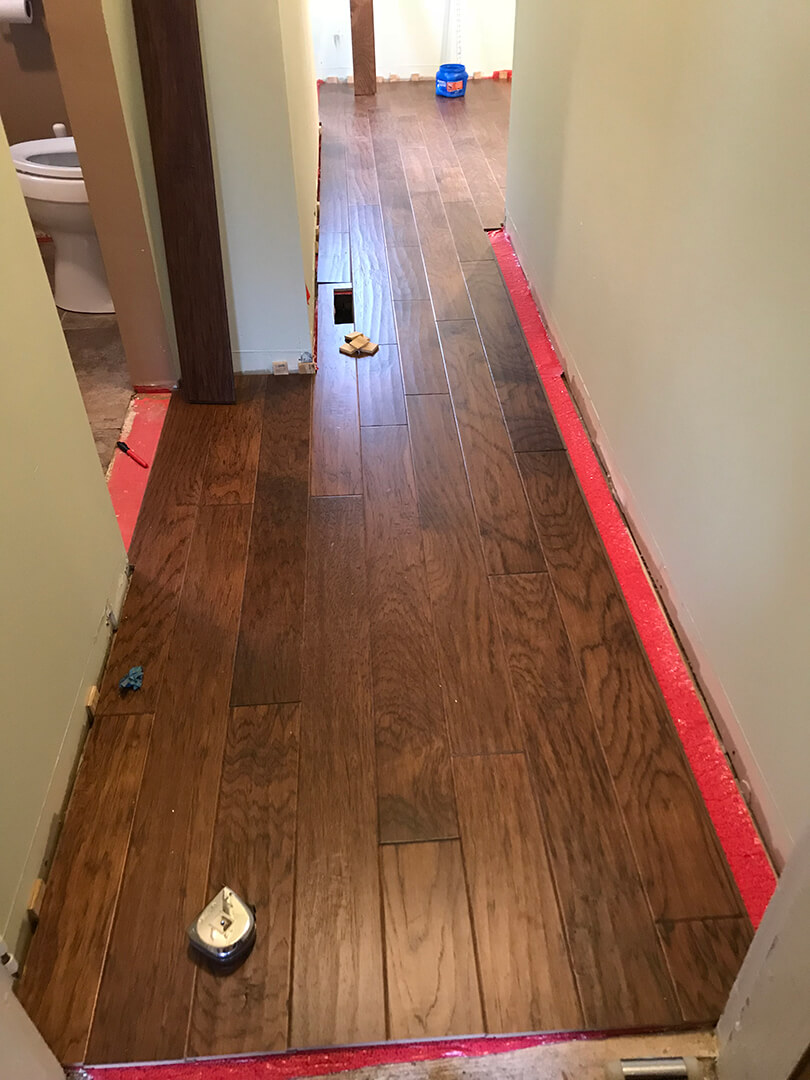
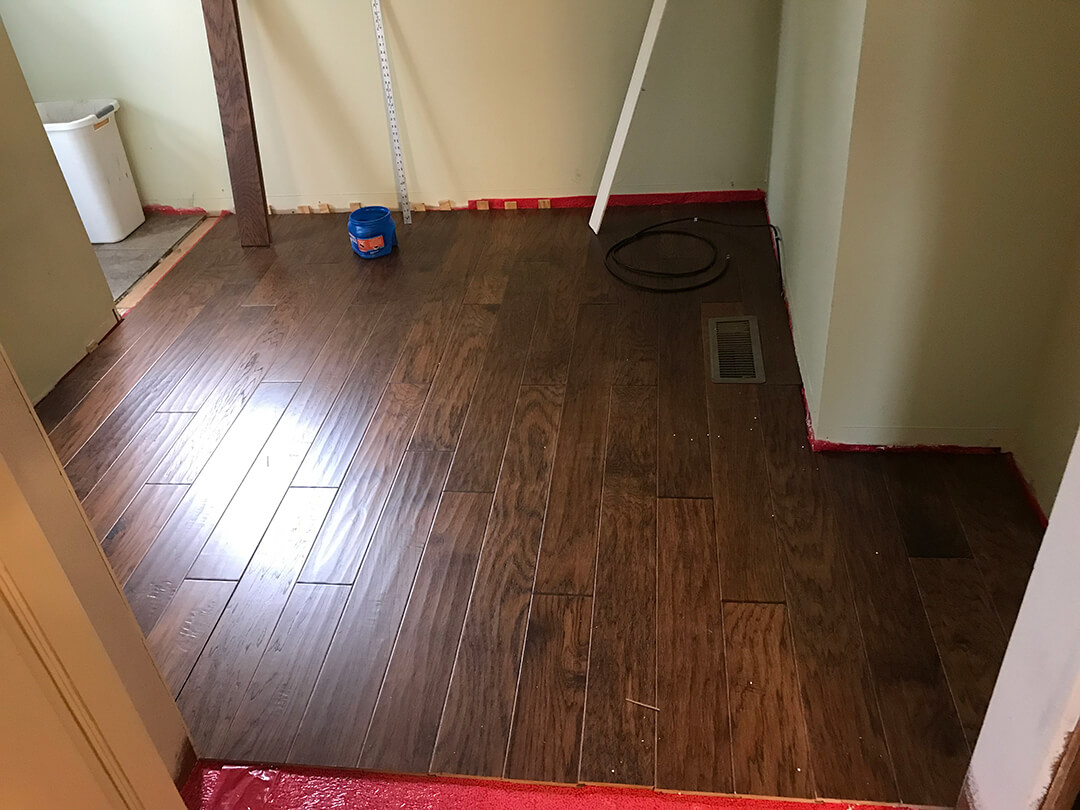
We checked out the wood samples at Home Depot and decided on Distressed Kinsley Hickory. I love the distressed look and the wood coordinated well with our kitchen tile, laundry tile and the other hardwood in the house.
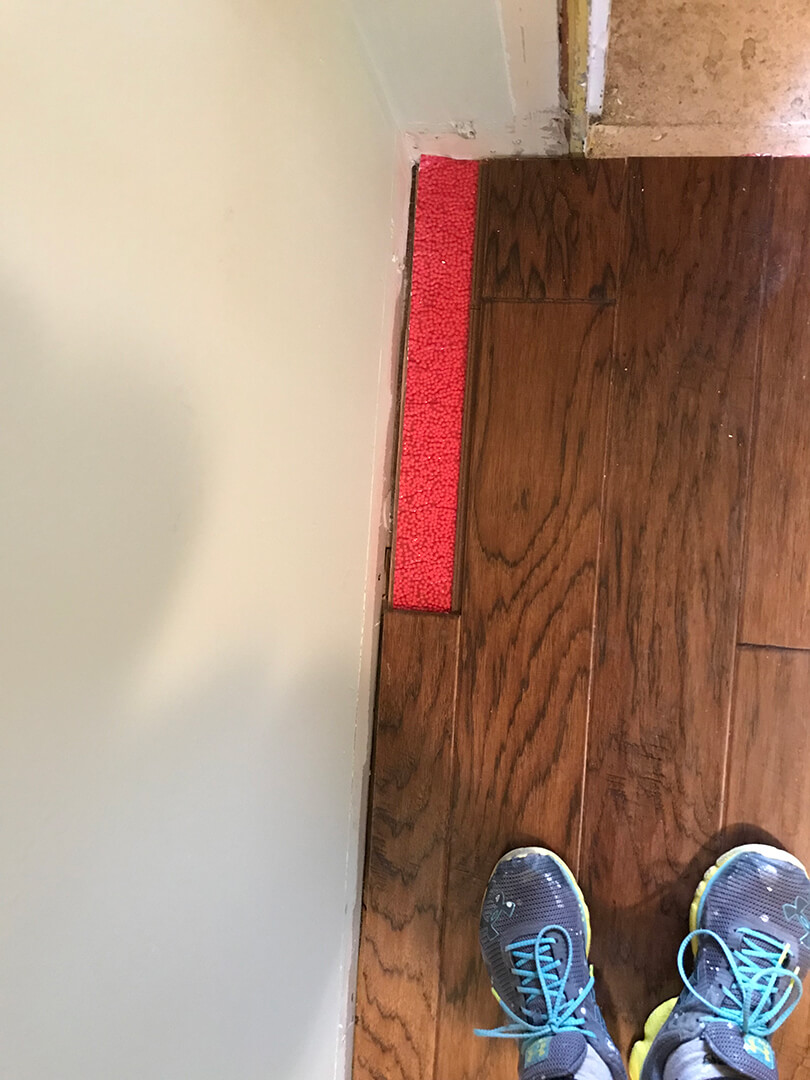
The theory with this floor is that when you install it, you leave a short space between the wood and where it meets the wall (which gets covered by the baseboard), so the floor has room to expand and contract. It’s heavy enough that it remains in place without being nailed down.
We found the theory proved to be true. The boards clicked and locked in place pretty easily. The hardest part was laying everything out.
Here’s what we did:
- The first step was to lay down underlayment. We used AirGuard. All we had to do was lay this down on the floor where we were doing the installation, leaving an inch or so up the walls.
- We layed out the boards a section at a time, starting at the top left of the room. When we came to the end of a row, we’d have to cut boards the make them fit. I think Dom lost 10 pounds going up and down stairs cutting boards.
- It took about a day to finish the entire floor. See pictures below.
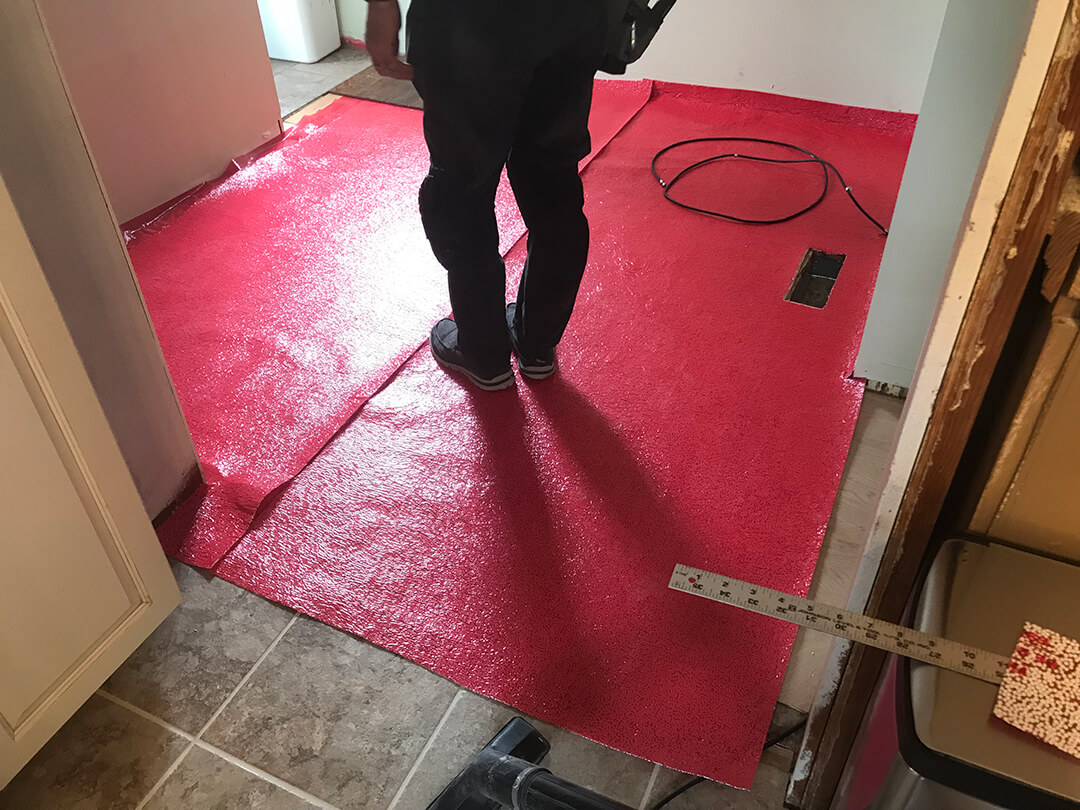
Dom testing out the AirGuard
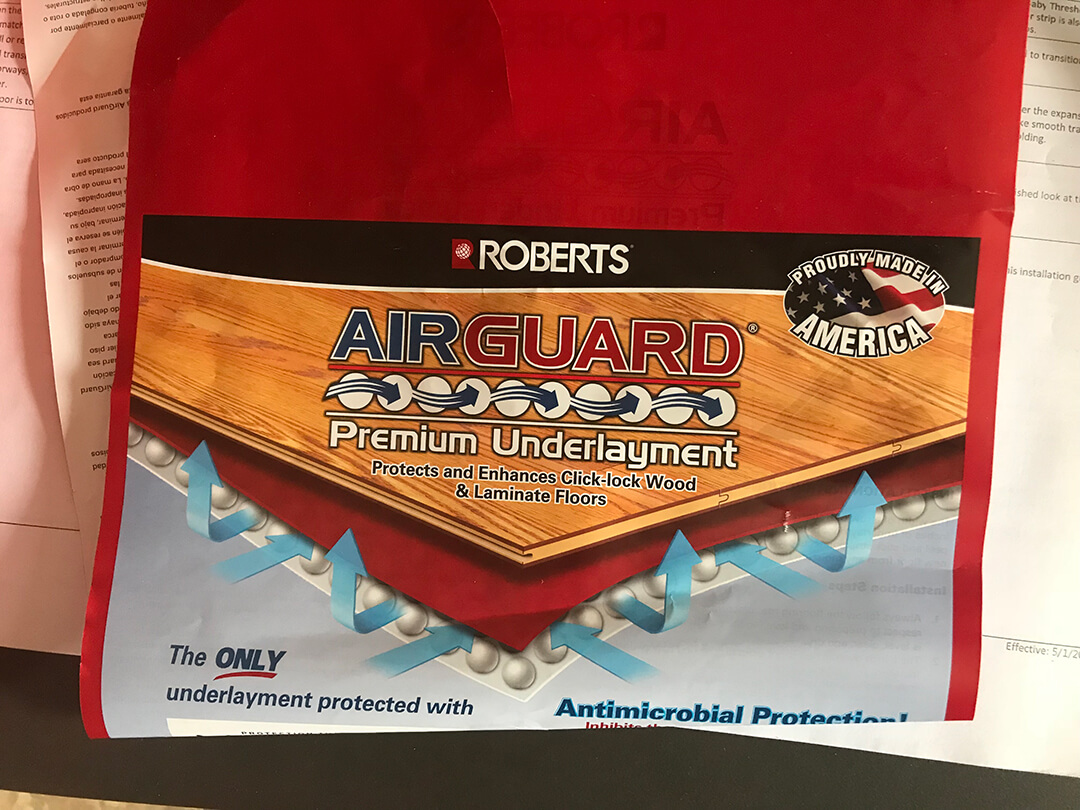
Air Guard label

The start of the layout
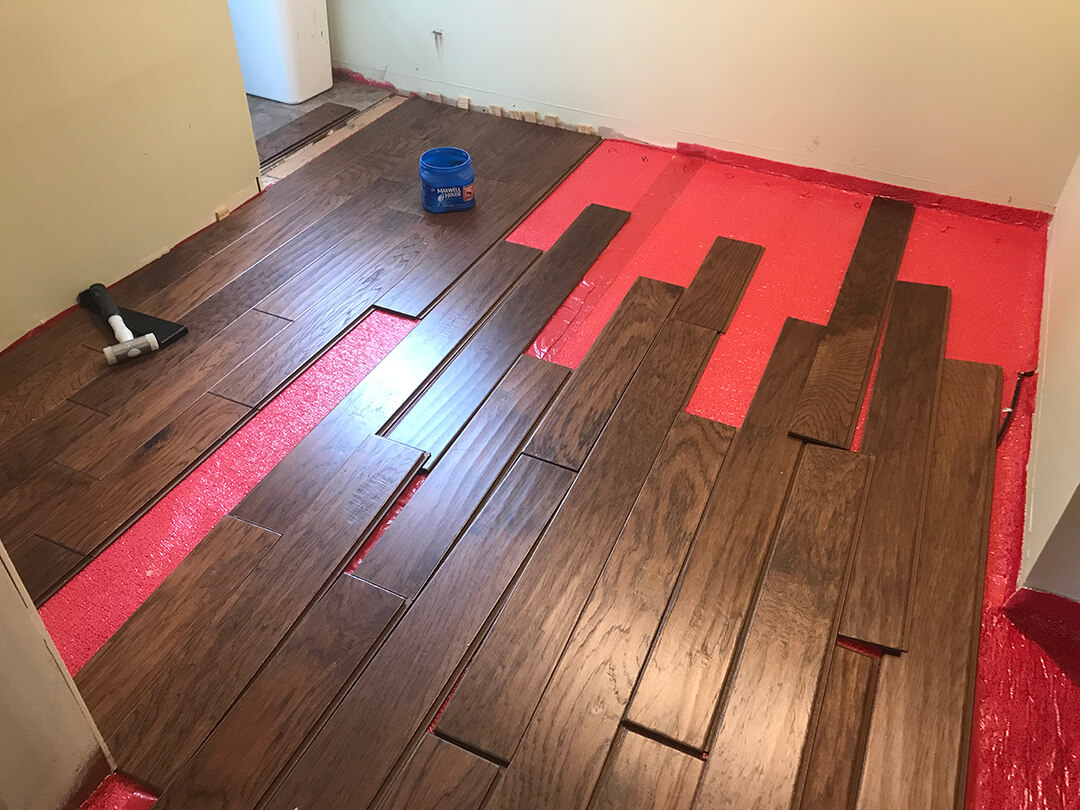
Planning out a section
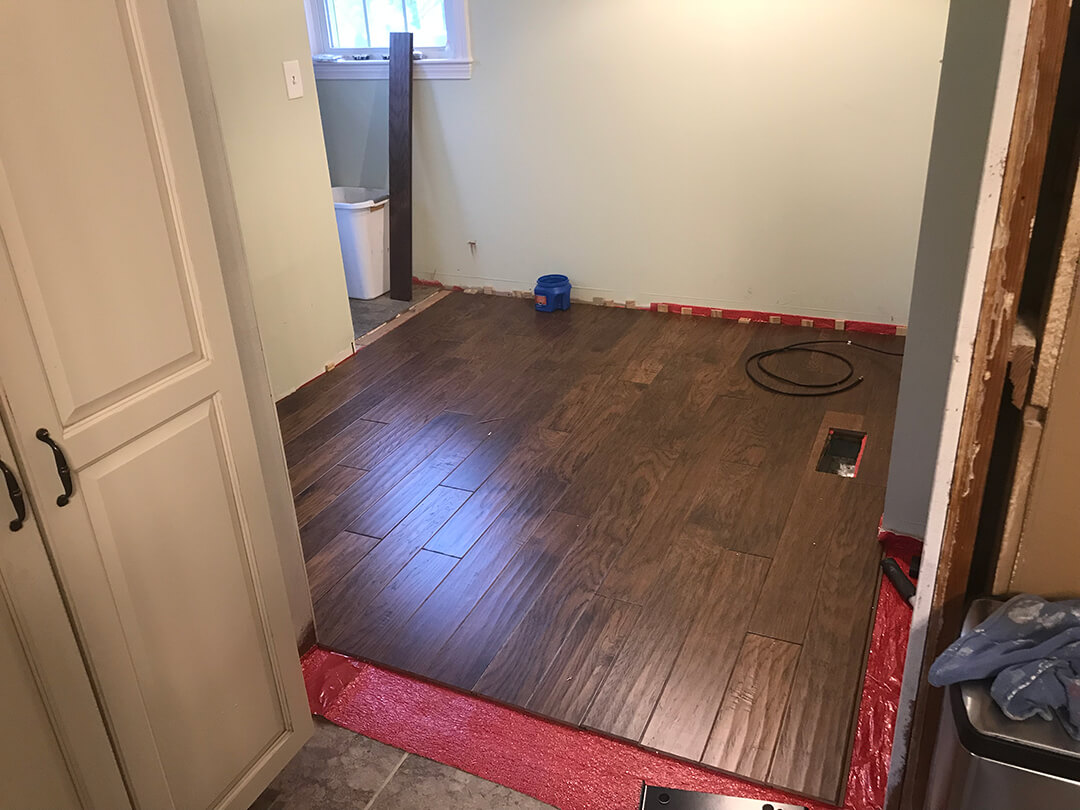
Top half complete
Hallway almost complete
Finished the last small jog
The very last piece!
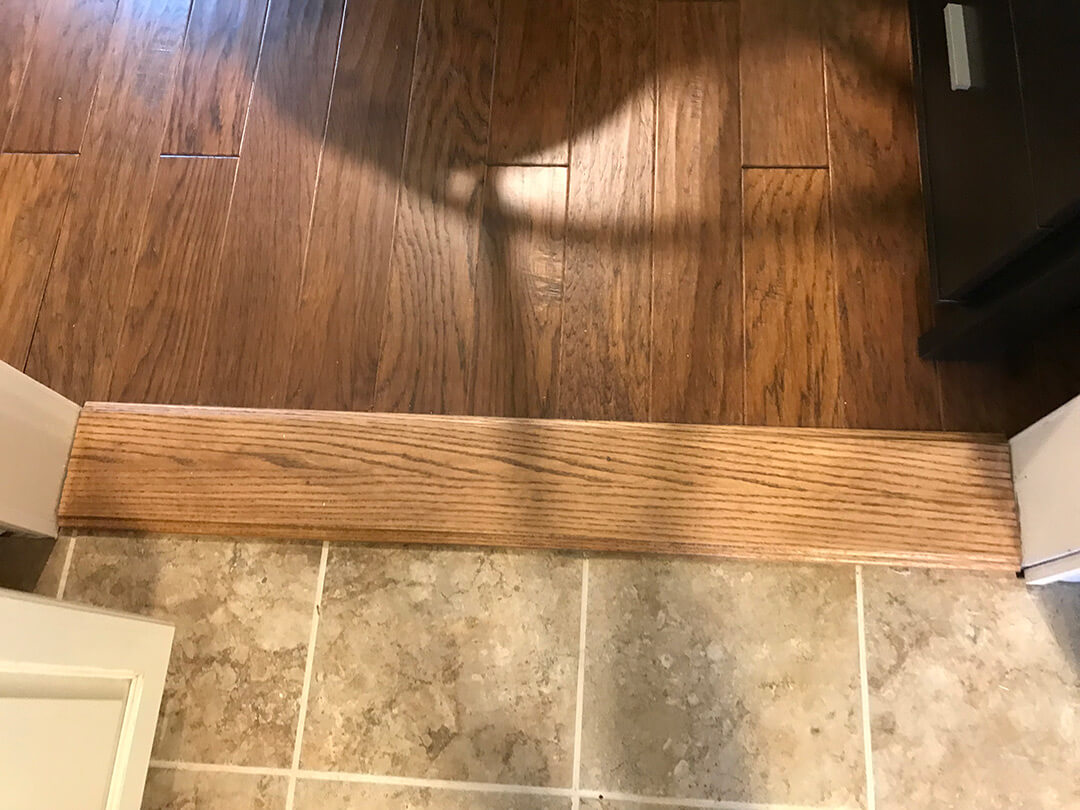
For the joins between the nook and the laundry room and the nook and the bathroom we used T-moldings (second picture below). They came out perfectly!
Kitchen to nook threshold
Dom hand made this and stained it in a color that would coordinate with everything.
Nook to laundry threshold
Dom used a T-molding in the same style as the hardwood floor and it worked out perfectly.
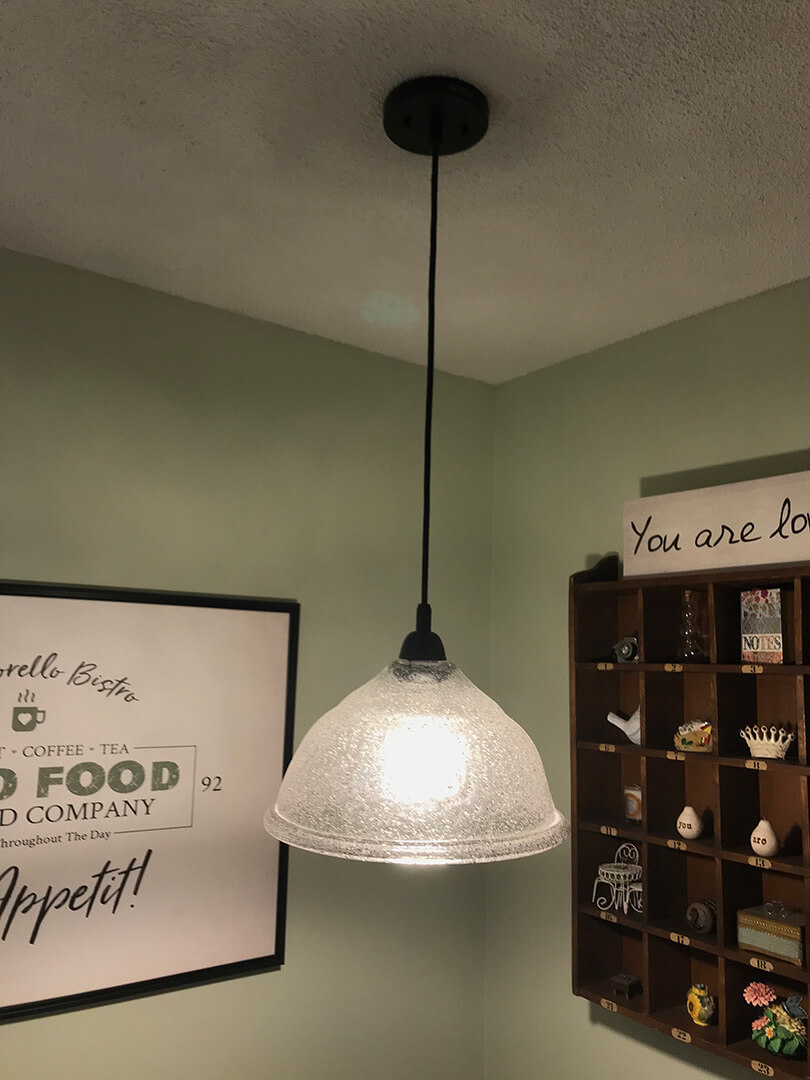
- Installed new light fixtures – in the hall, the laundry area and in the breakfast nook.
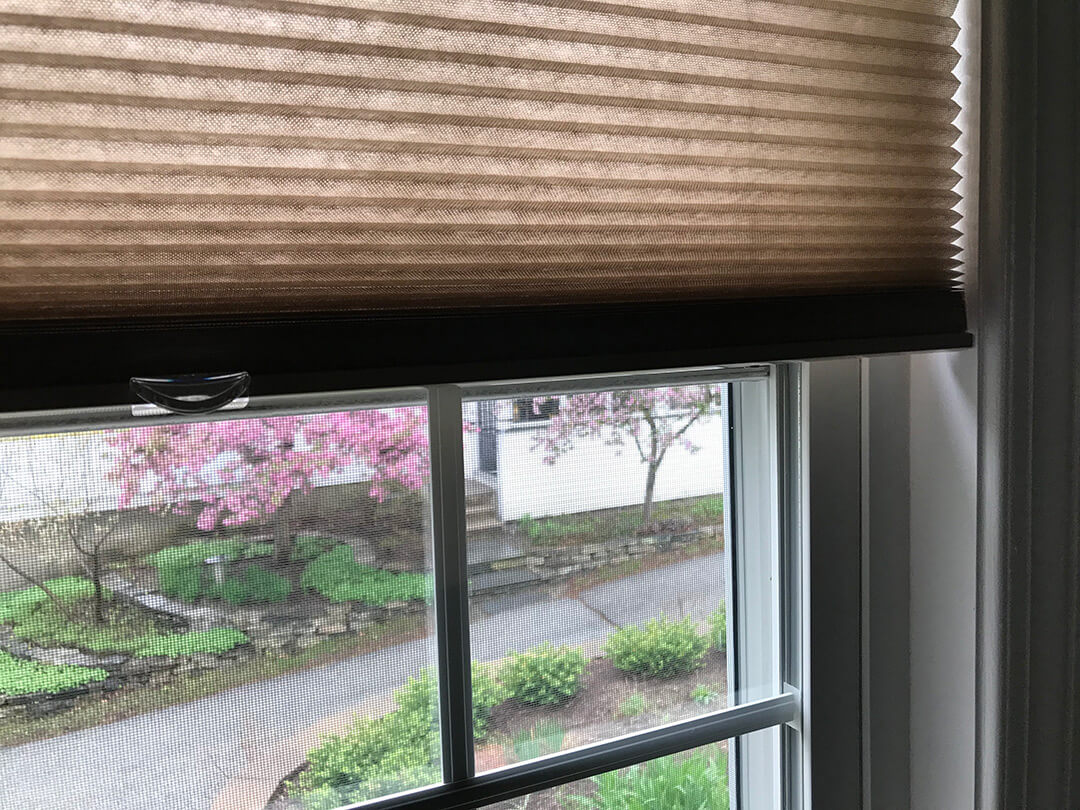
- Installed new blinds for the two windows in the laundry area.
- Installed all the face plates.
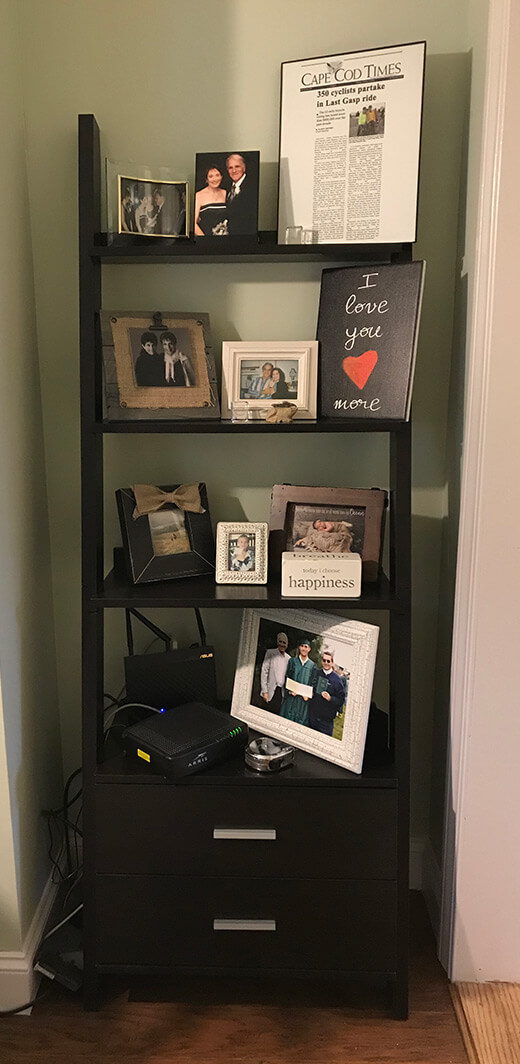
- Moved the ladder shelf back into the area and updated the picture frames.
- Hung the cubby wall piece and placed all the little pieces in the cubbies (some of them new, I LOVE miniature decor pieces!).
- Hung all the other new wall art.
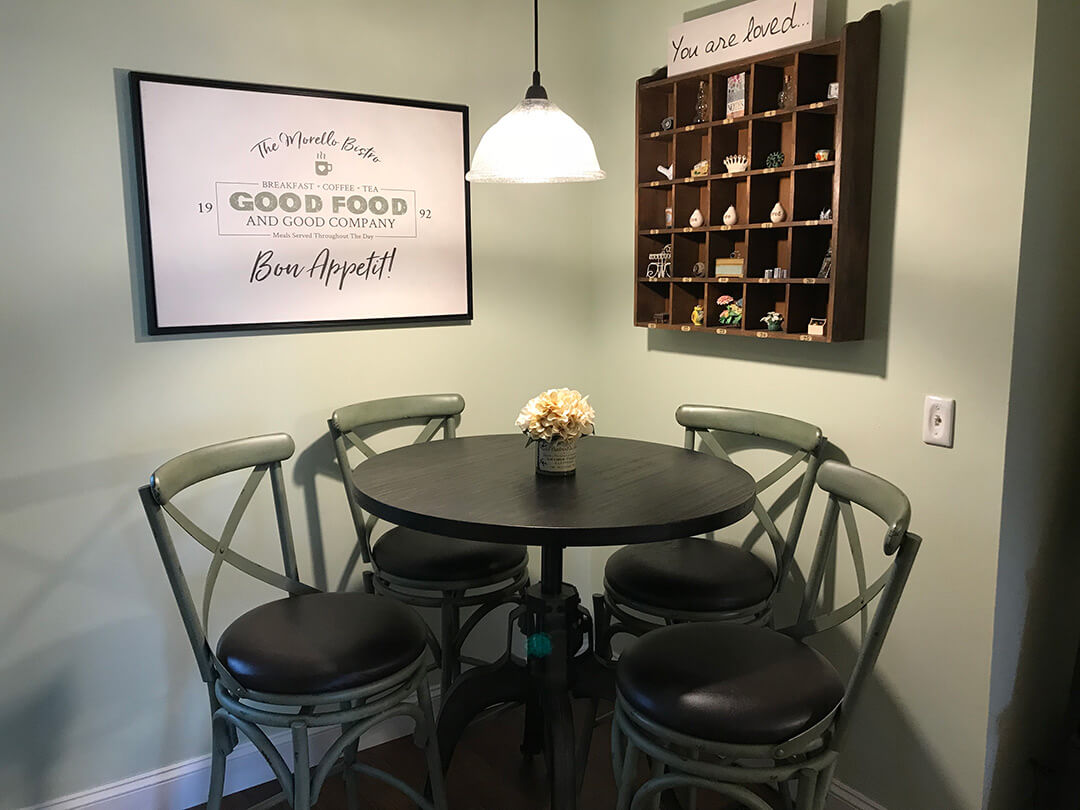
- Moved in the new bistro table and chairs.
Roomview
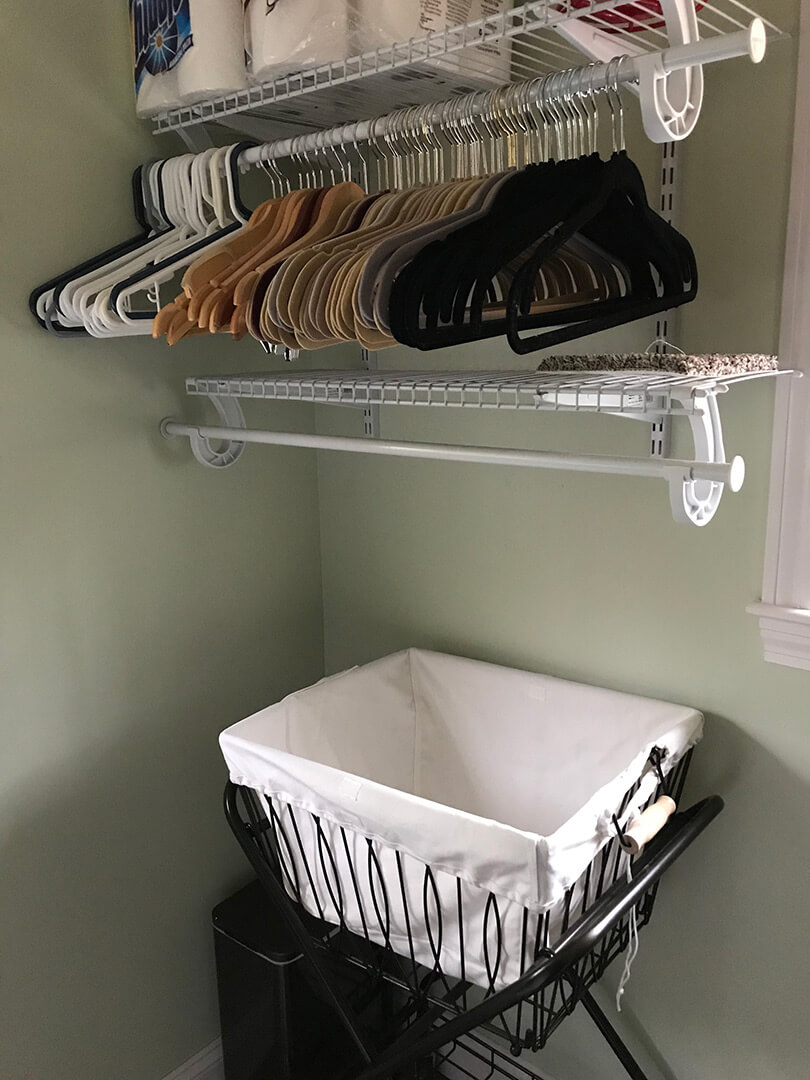
Here’s a view of both sides of the new laundry area.
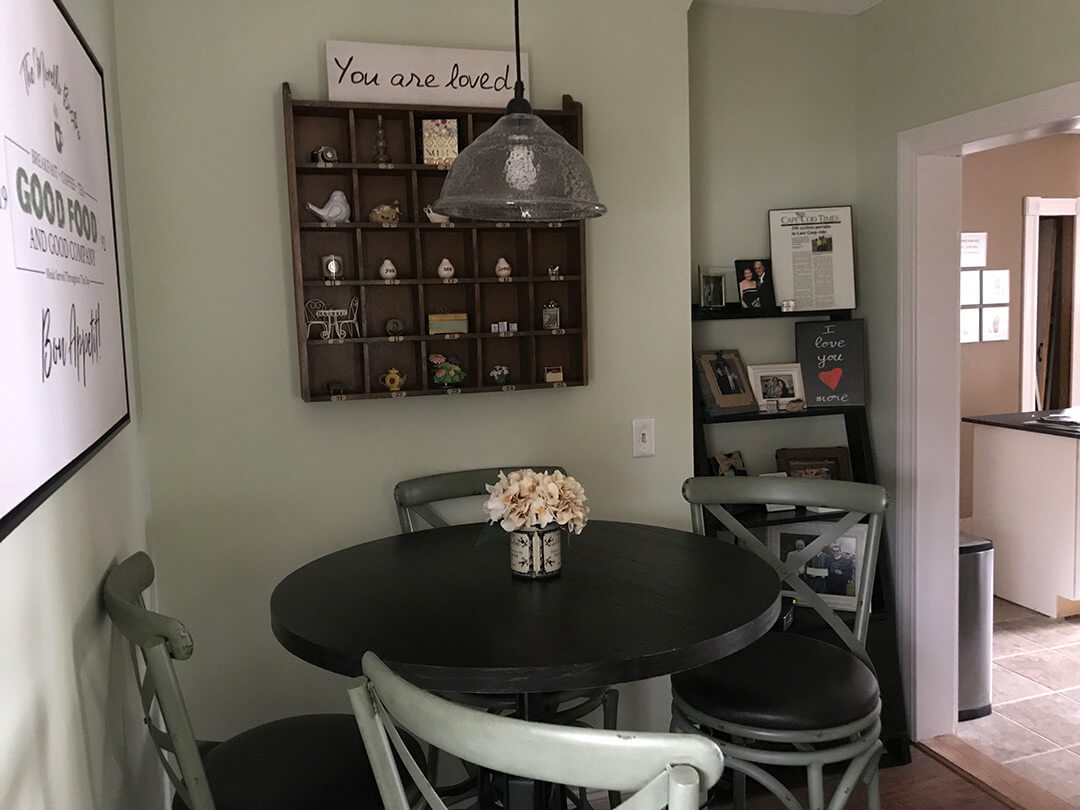
The breakfast nook from a two different sides.
features I LOVE
Hover over the images for details (unless you’re on mobile, then tap on the image).
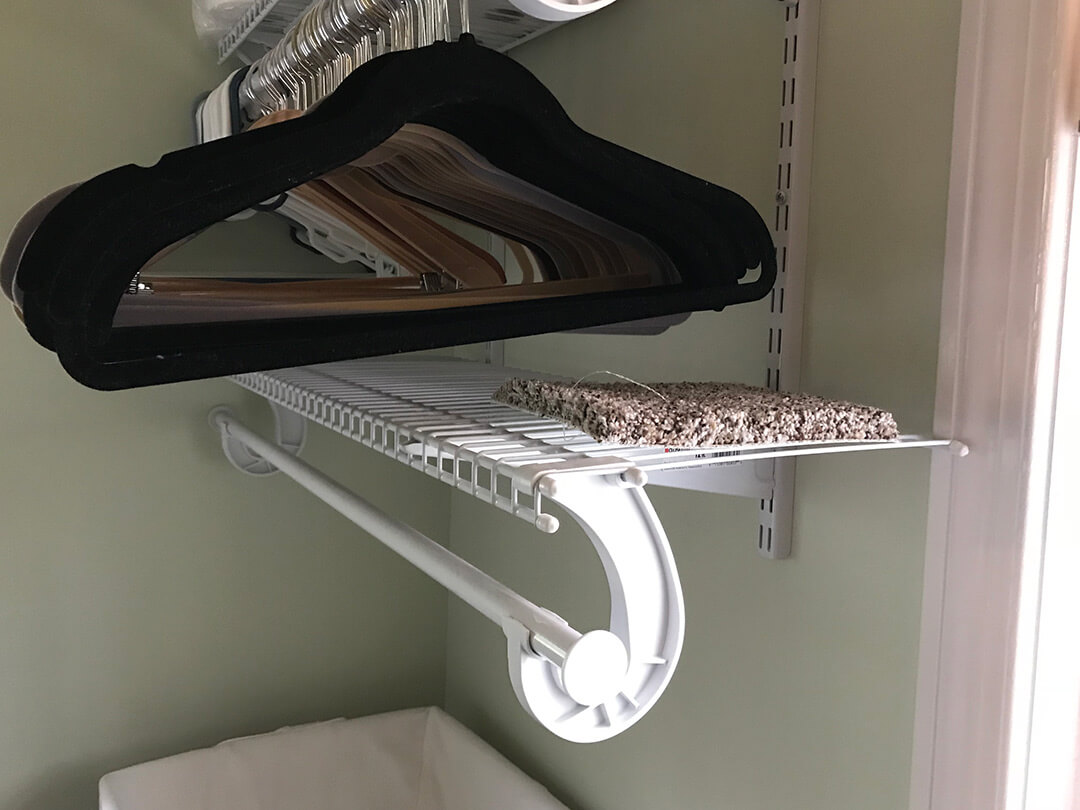
Laundy Basket & Shelves
They are within arm's reach and the perfect size for putting away laundry as it comes out of the dryer. Love! See links below.
Article
I printed this article about Dom and brother-in-law Bob from the Cape Cod Times, from way back when. Love it.
I Love You More
Sign from Pottery Barn (no longer available)
Quote Block
From the Paper Store. I turn it occasionally when I feel the need to change the quote.
Ladder Shelf
It could not fit in the space it's in any better if we custom made it. Perfect fit and I change out the pictures and decor from time to time.
Picture Frames
Always half priced at Hobby Lobby!
Light switches
This room has porcelain switch plates, original to the home. Love!
SHOPPING links


How about you?
Do you have a favorite area or room in your house that you’ve renovated? I’d love to hear about it. Please share in the comments below!